ZenCreator Image Editor
AI Image Generator From Image:Upload a Photo, Generate a New Image
Upload your photo as the reference, describe what should change, and generate a new image that starts from the subject, framing, and look you already have rather than from a blank prompt field.
Credits never expire
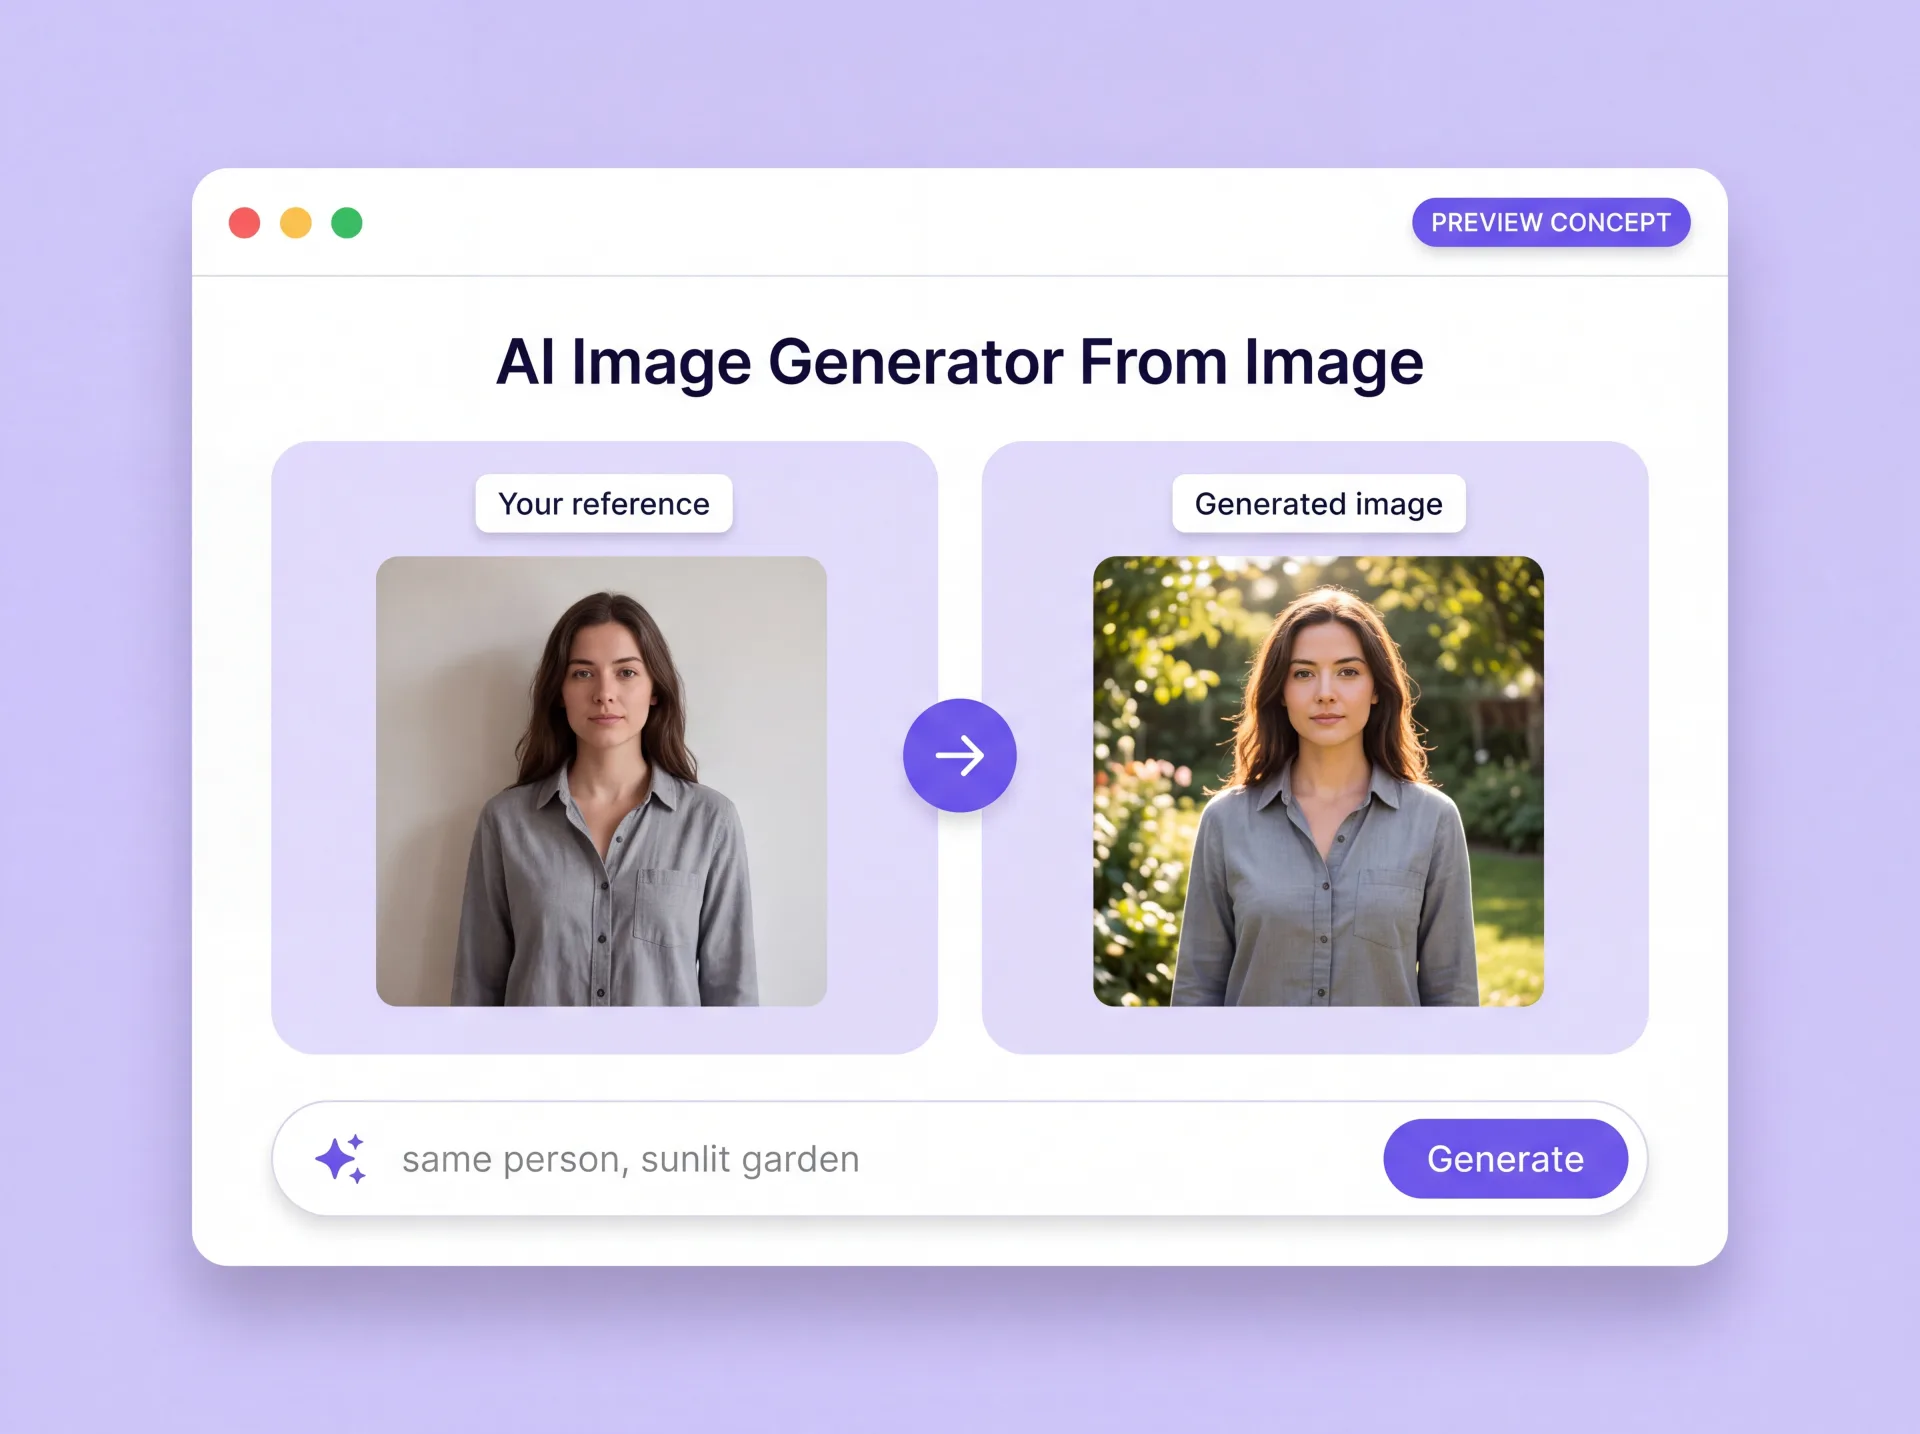
What an AI Image Generator From Image Actually Does
Upload a photo and it becomes the reference for a model you choose: ZenCreator generates a new image from that reference, and an optional prompt tells the model what should change. As an AI image to image generator, the Image Editor works from the file you supply rather than from a written description alone, so the subject, composition, and look carry over from your shot. The same AI photo generator can combine several references into one result, restyle a product shot, or return several variations in a single run.
ZenCreator's editor is generative: it produces a new image from your reference instead of retouching the original, so there are no layers, brushes, or curves.
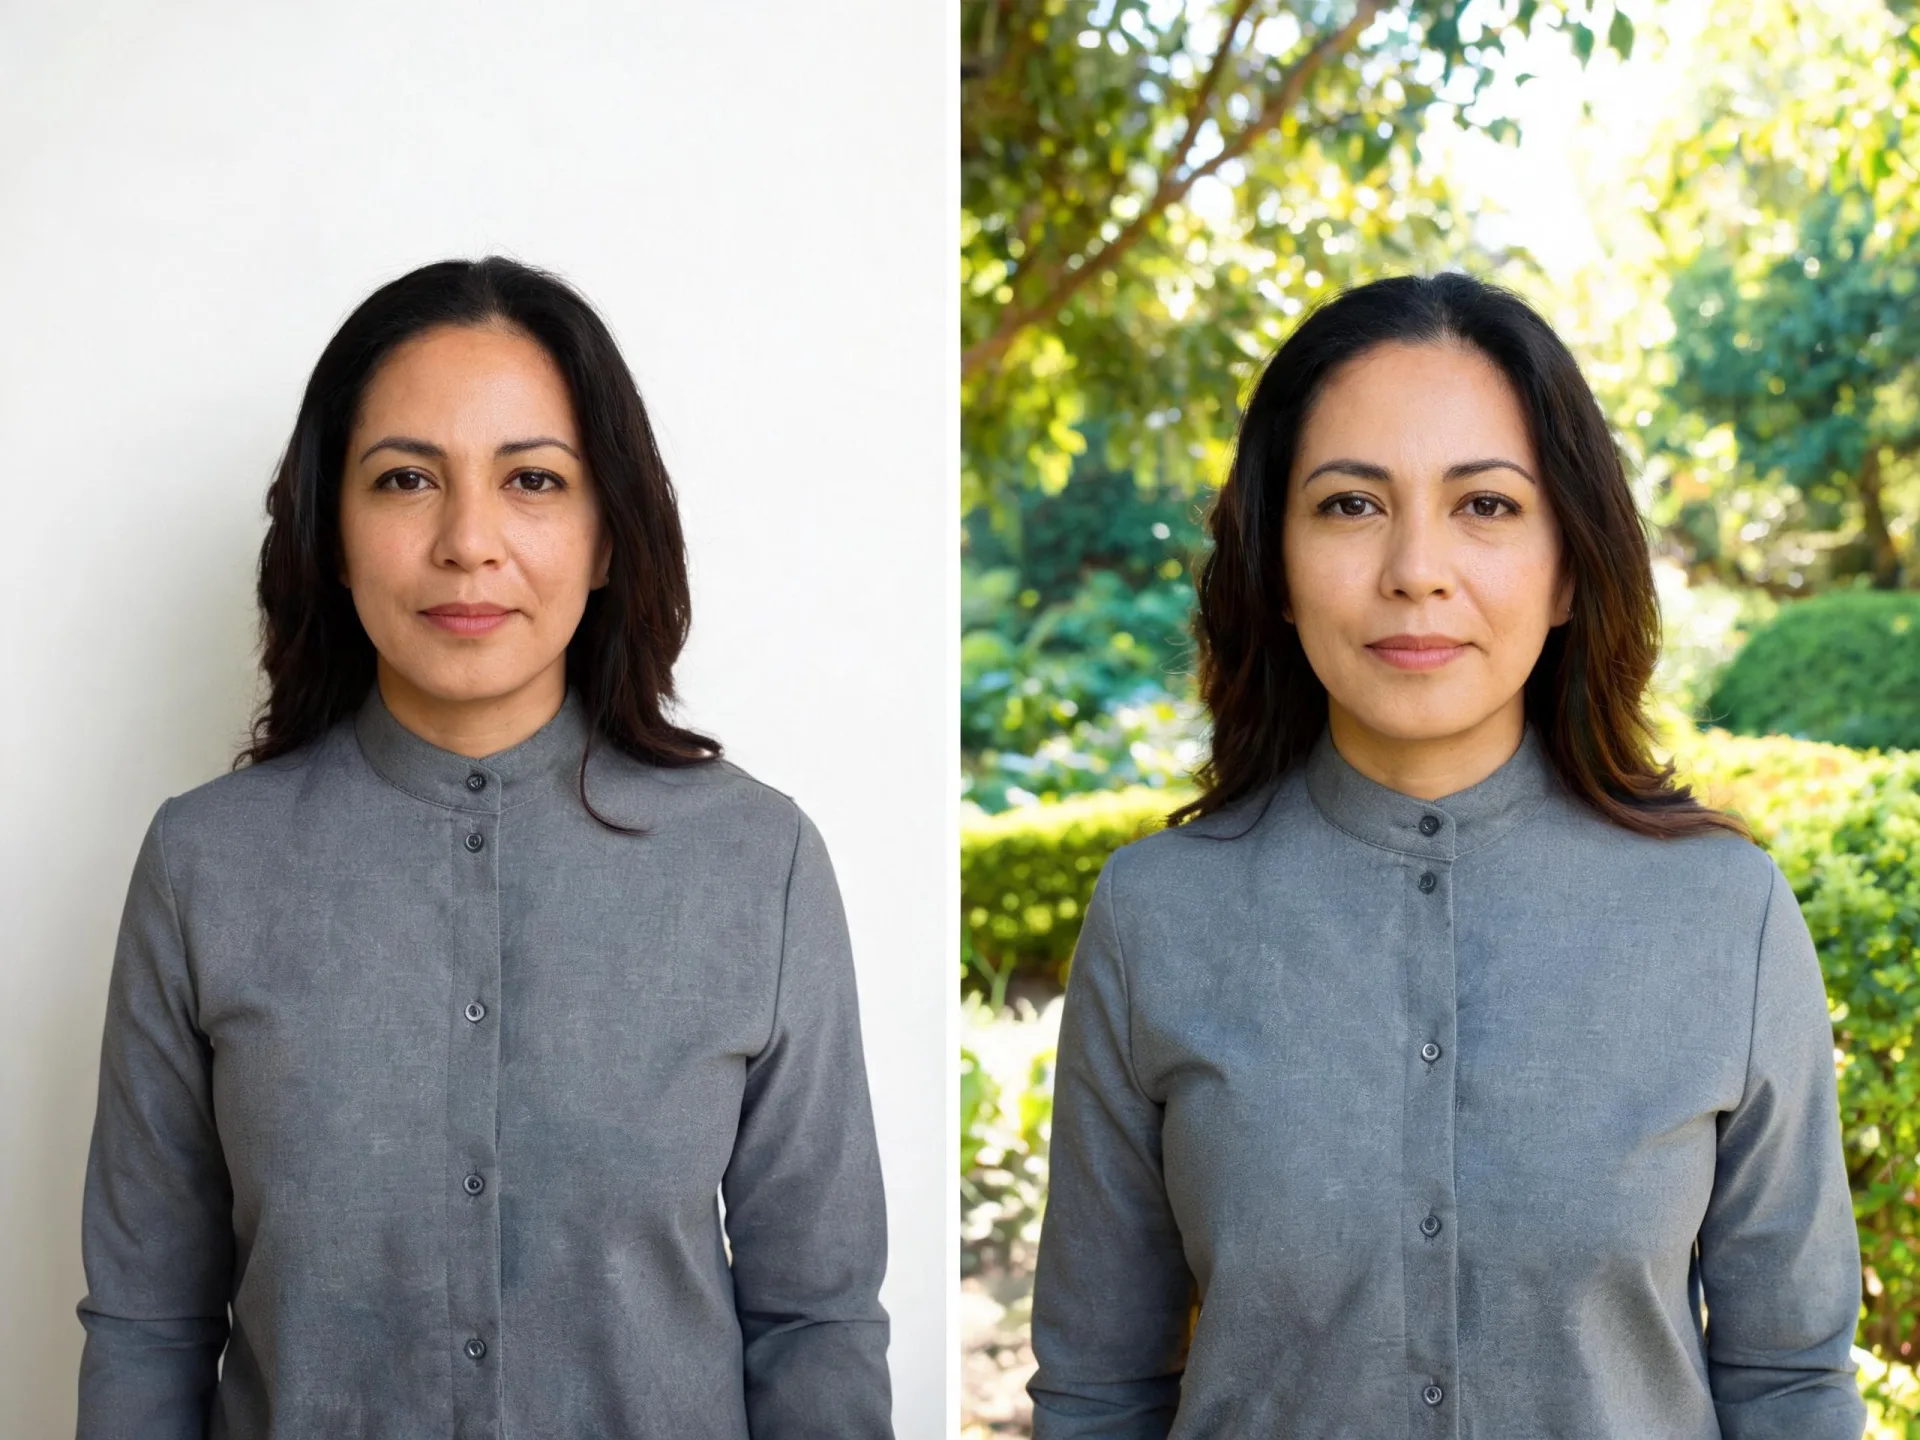
Image to Image AI: What You Can Change From One Reference
Your reference sets the starting point; the prompt sets the change. Every job below can generate images from other images you already have, inside one editor rather than a separate tool per task.
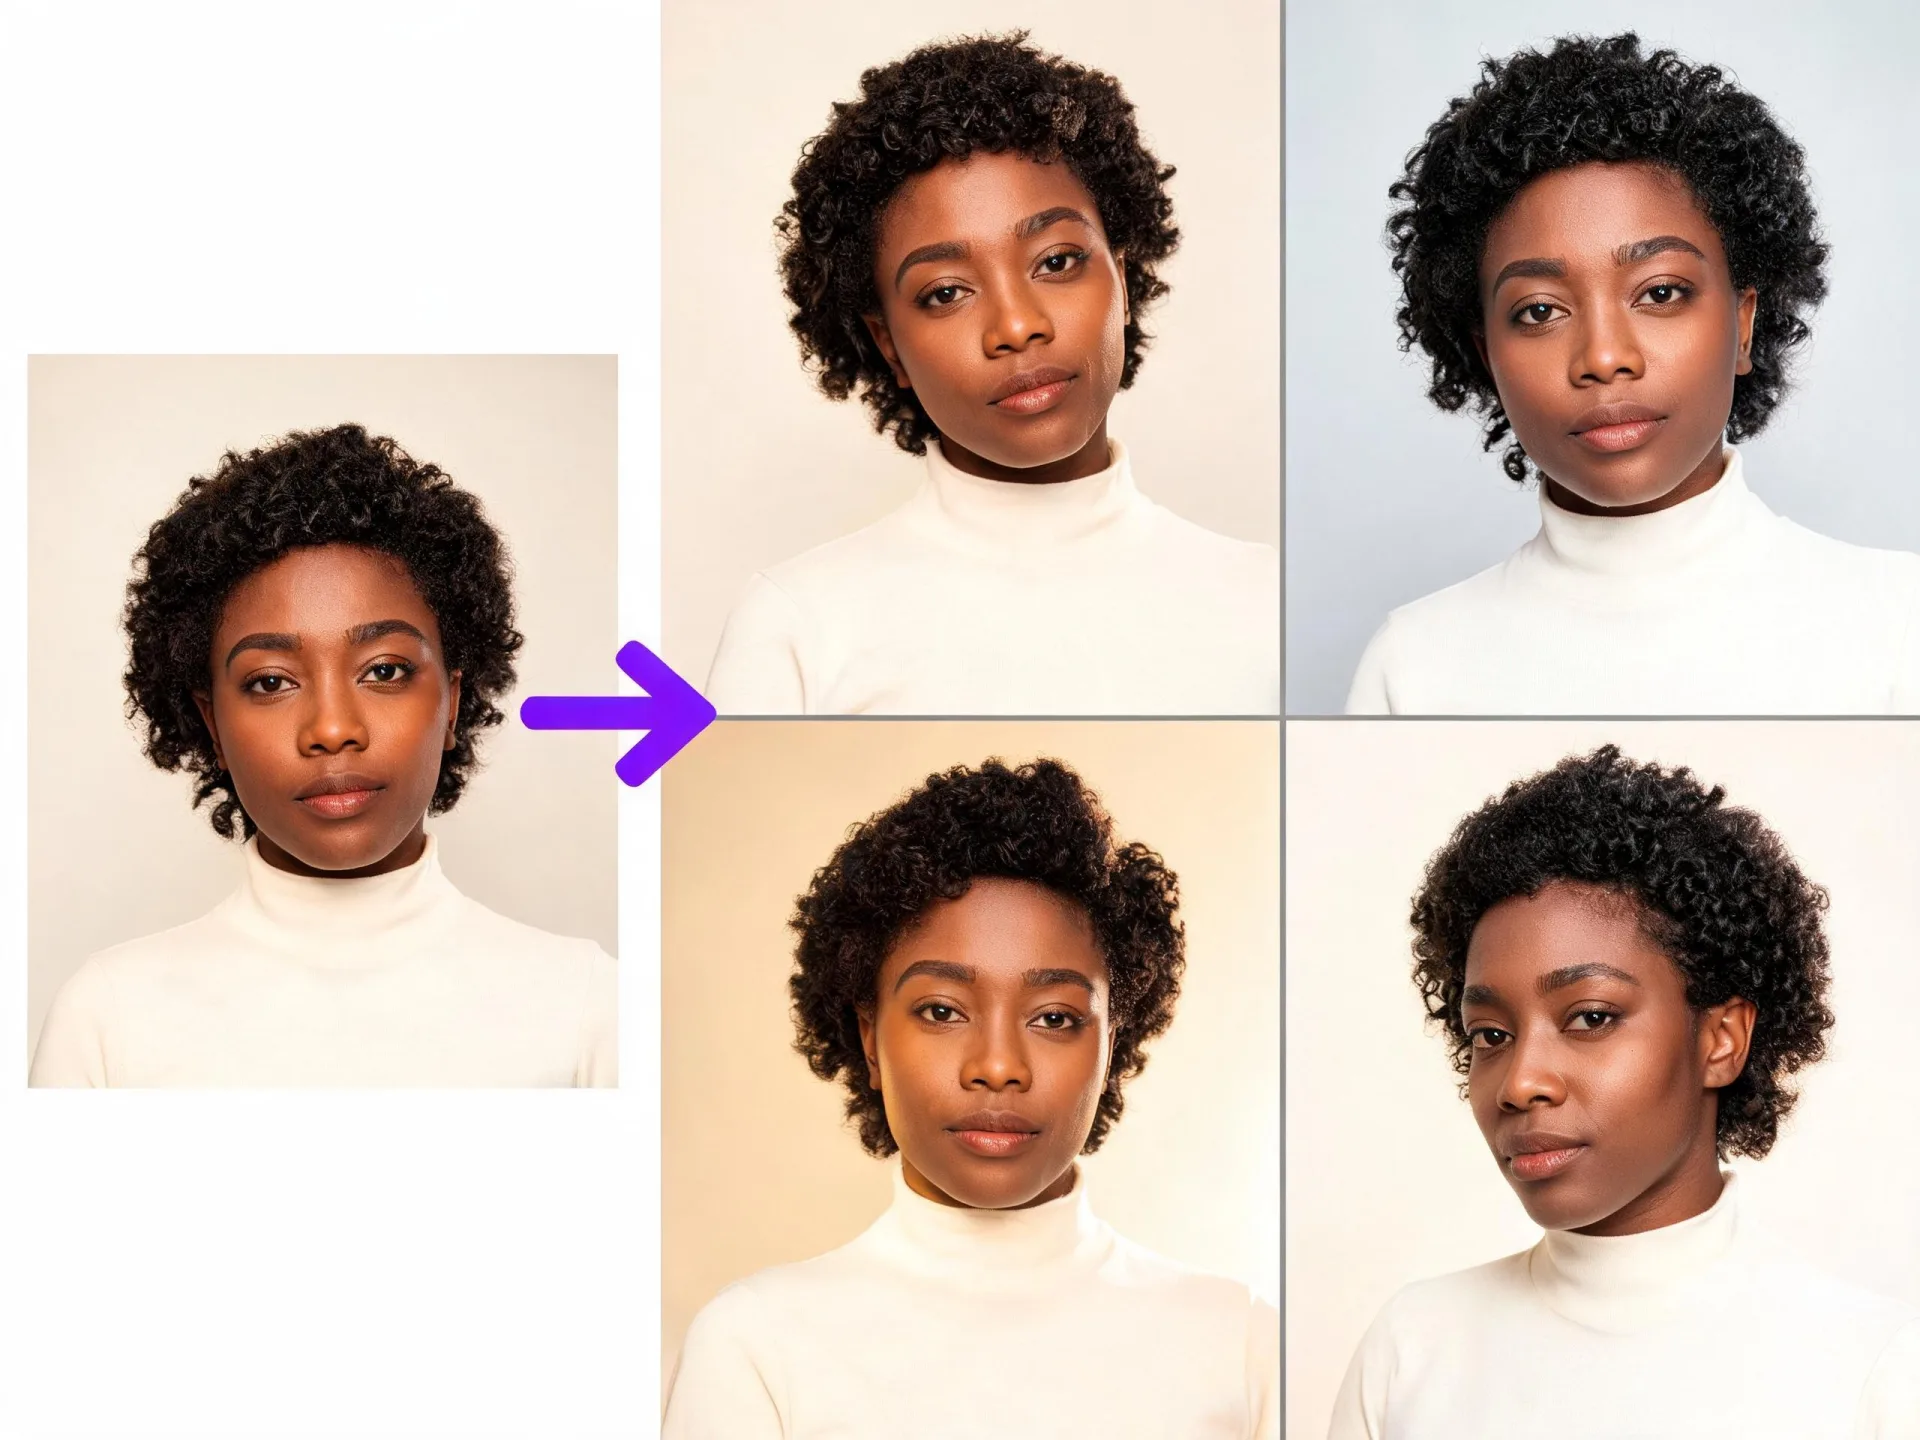
Create AI images from photos
Upload the photo, describe the result you want, and generate a new image based on it. One reference is enough to start, and the same run can return several versions to pick from.
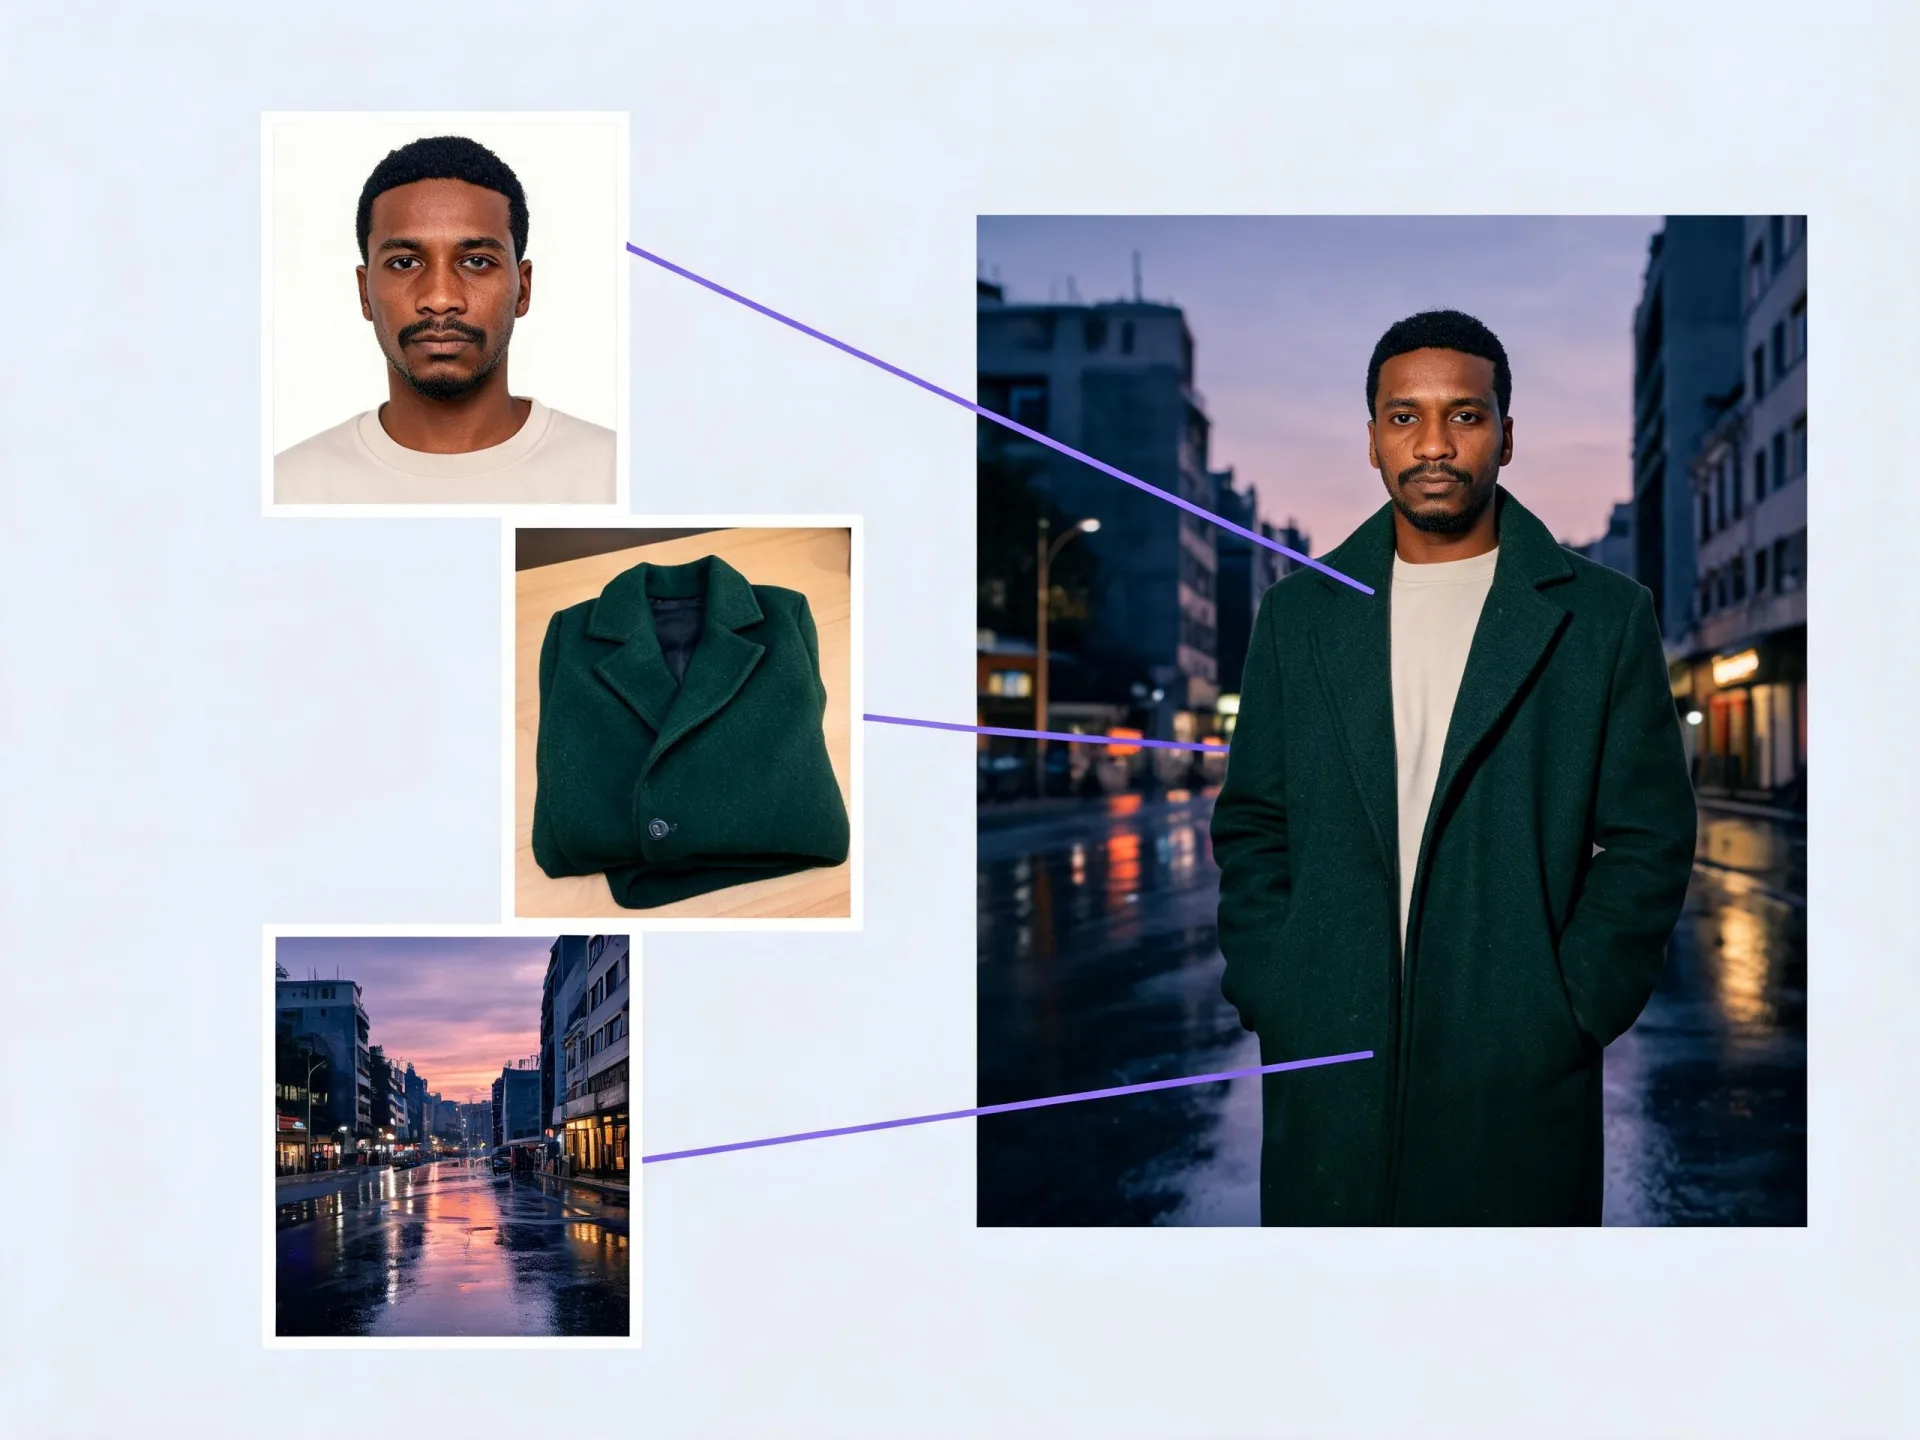
Combine several references into one image
Add more than one reference and the model works from all of them in a single result: a subject from one file, a garment or product from another, a setting from a third.
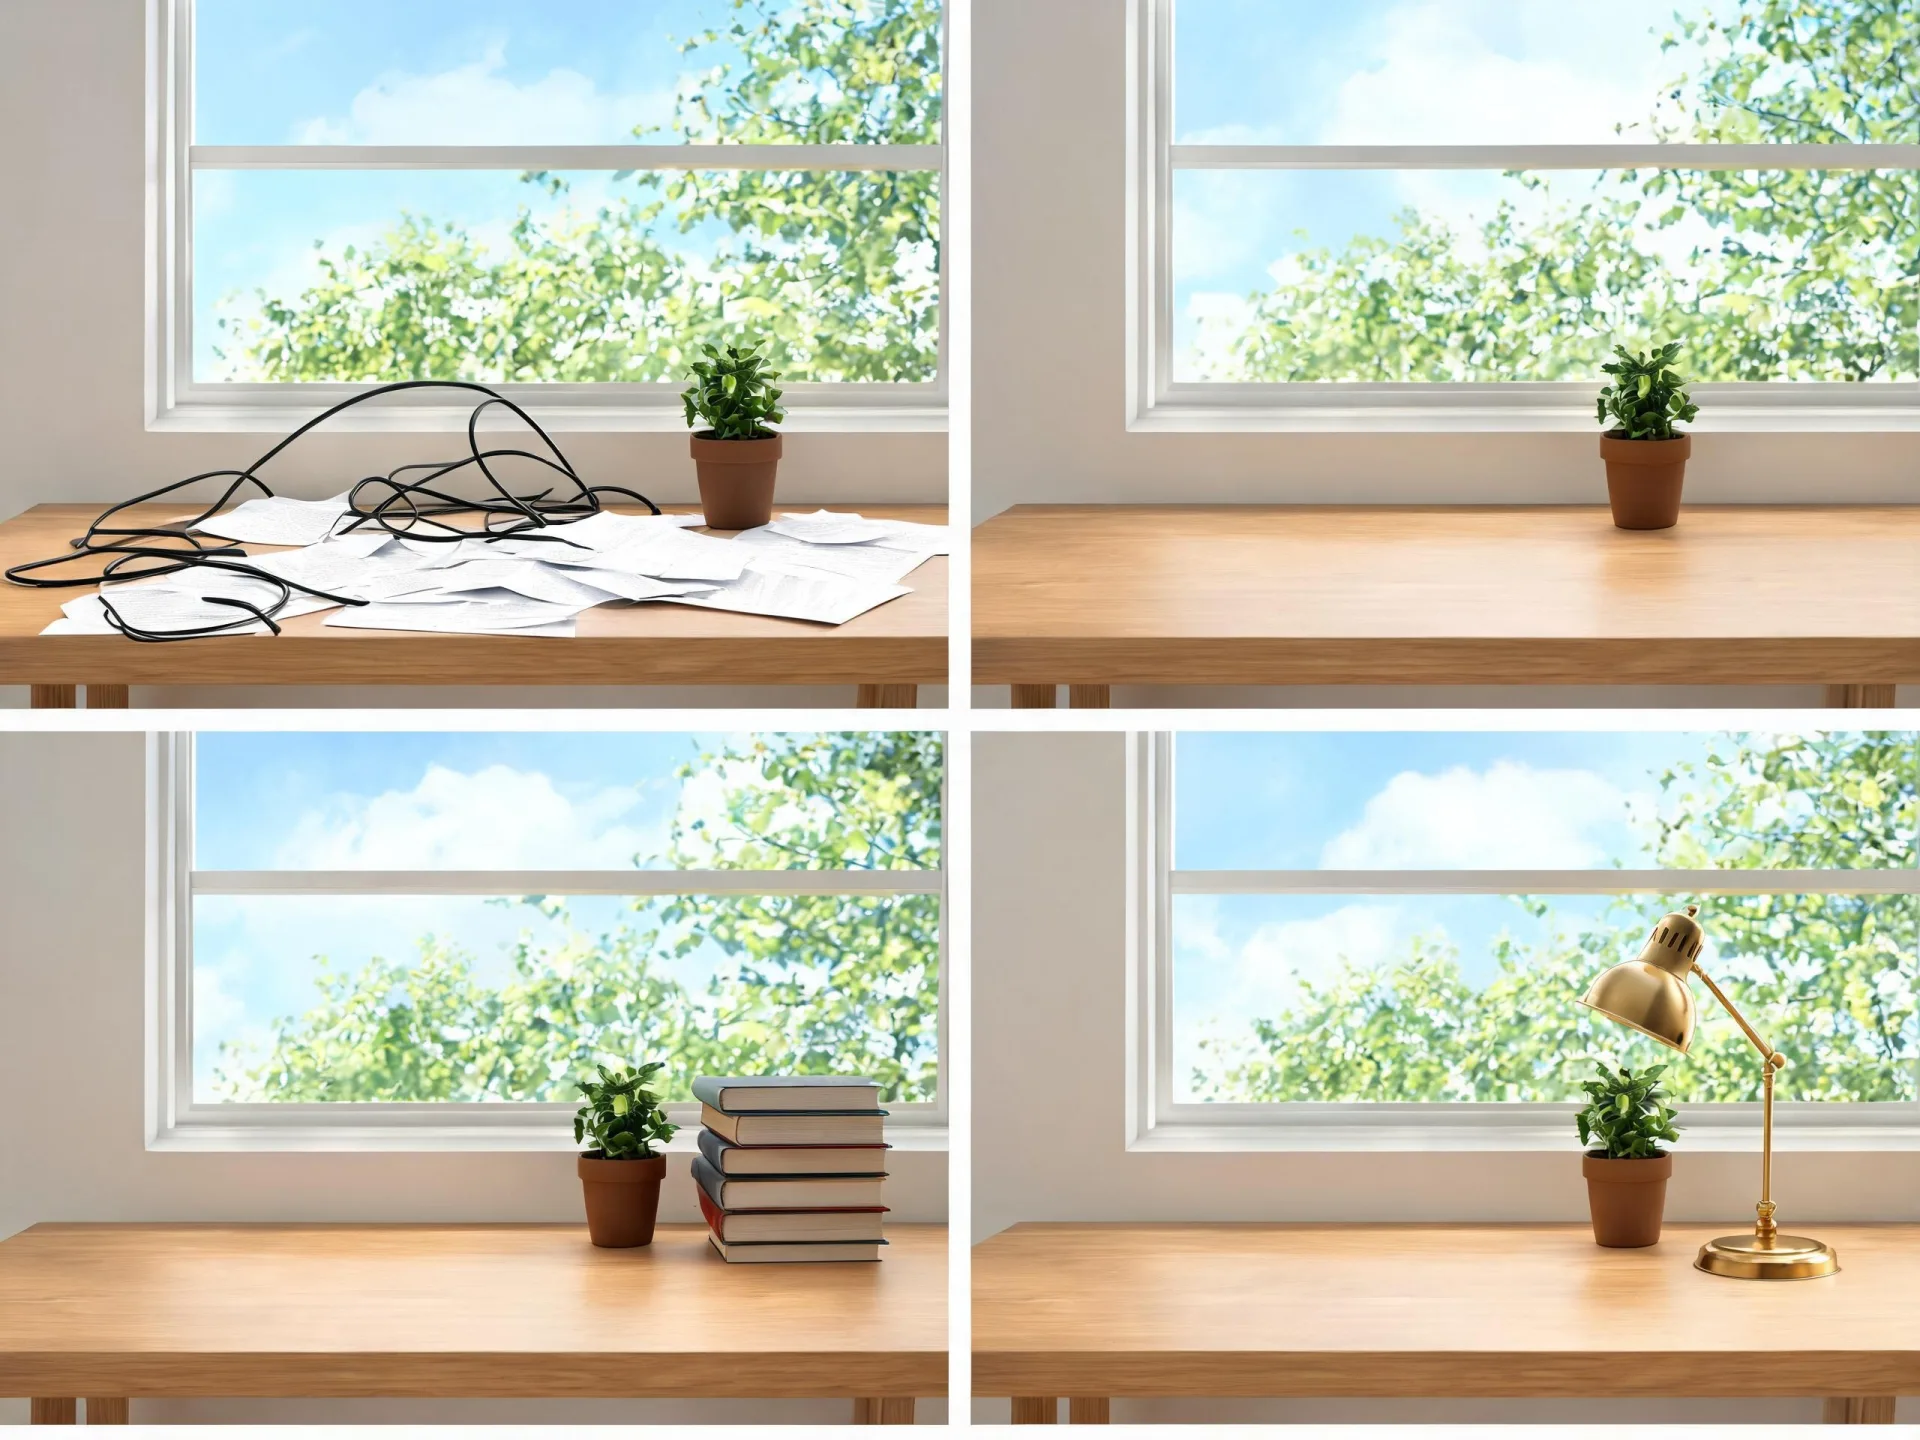
Add, remove, or replace what's in the frame
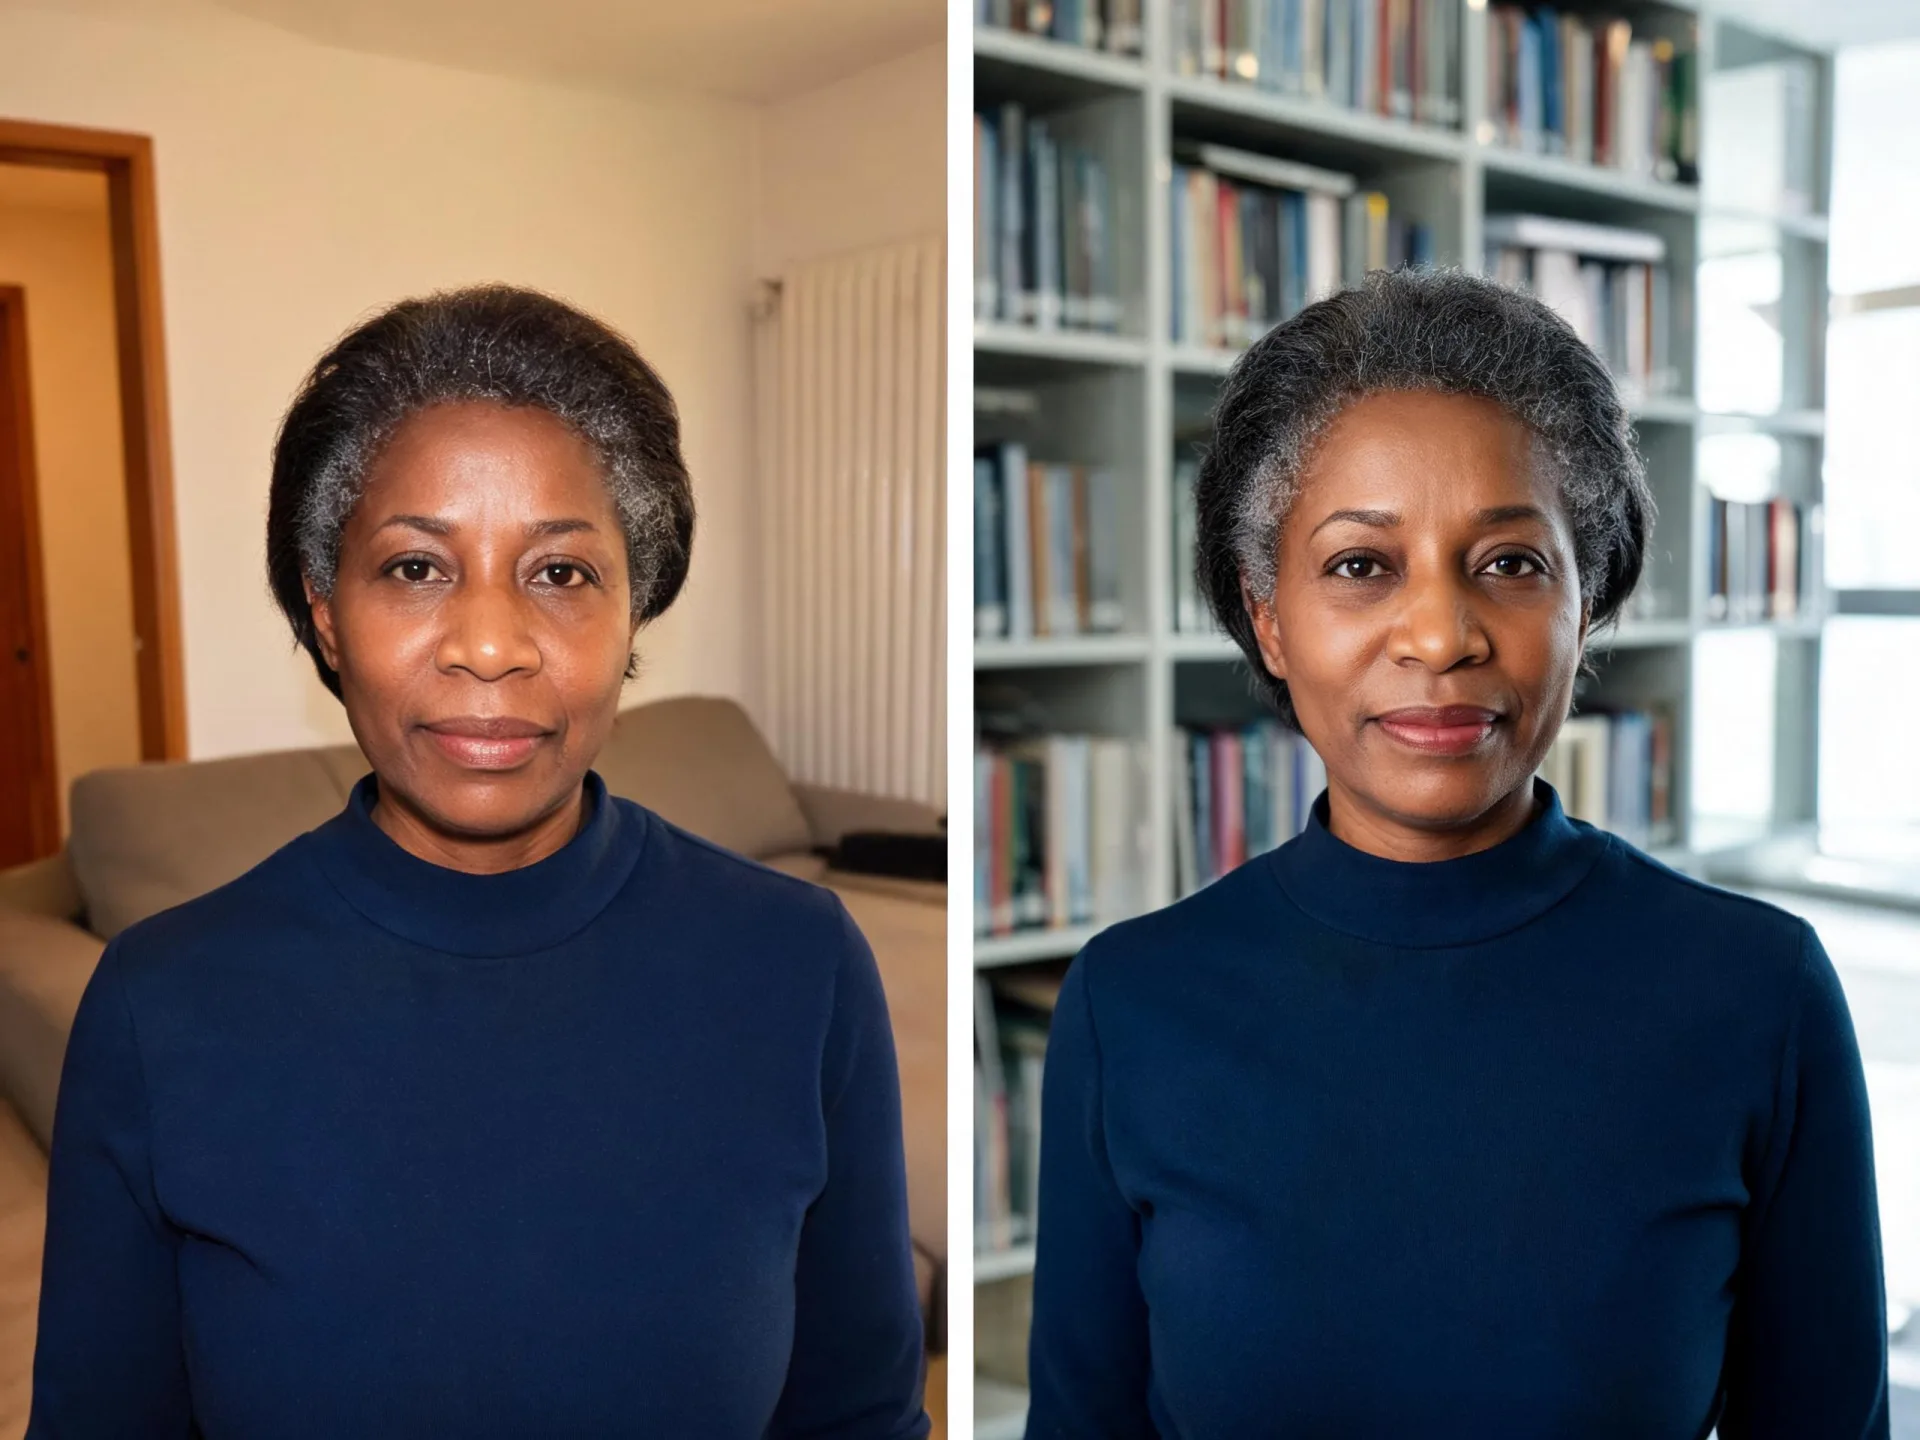
Ask for an element to be added, taken out, swapped, or modified, and the generated version reflects that instruction. Useful for clearing a cluttered background or putting the same product in a different setting.
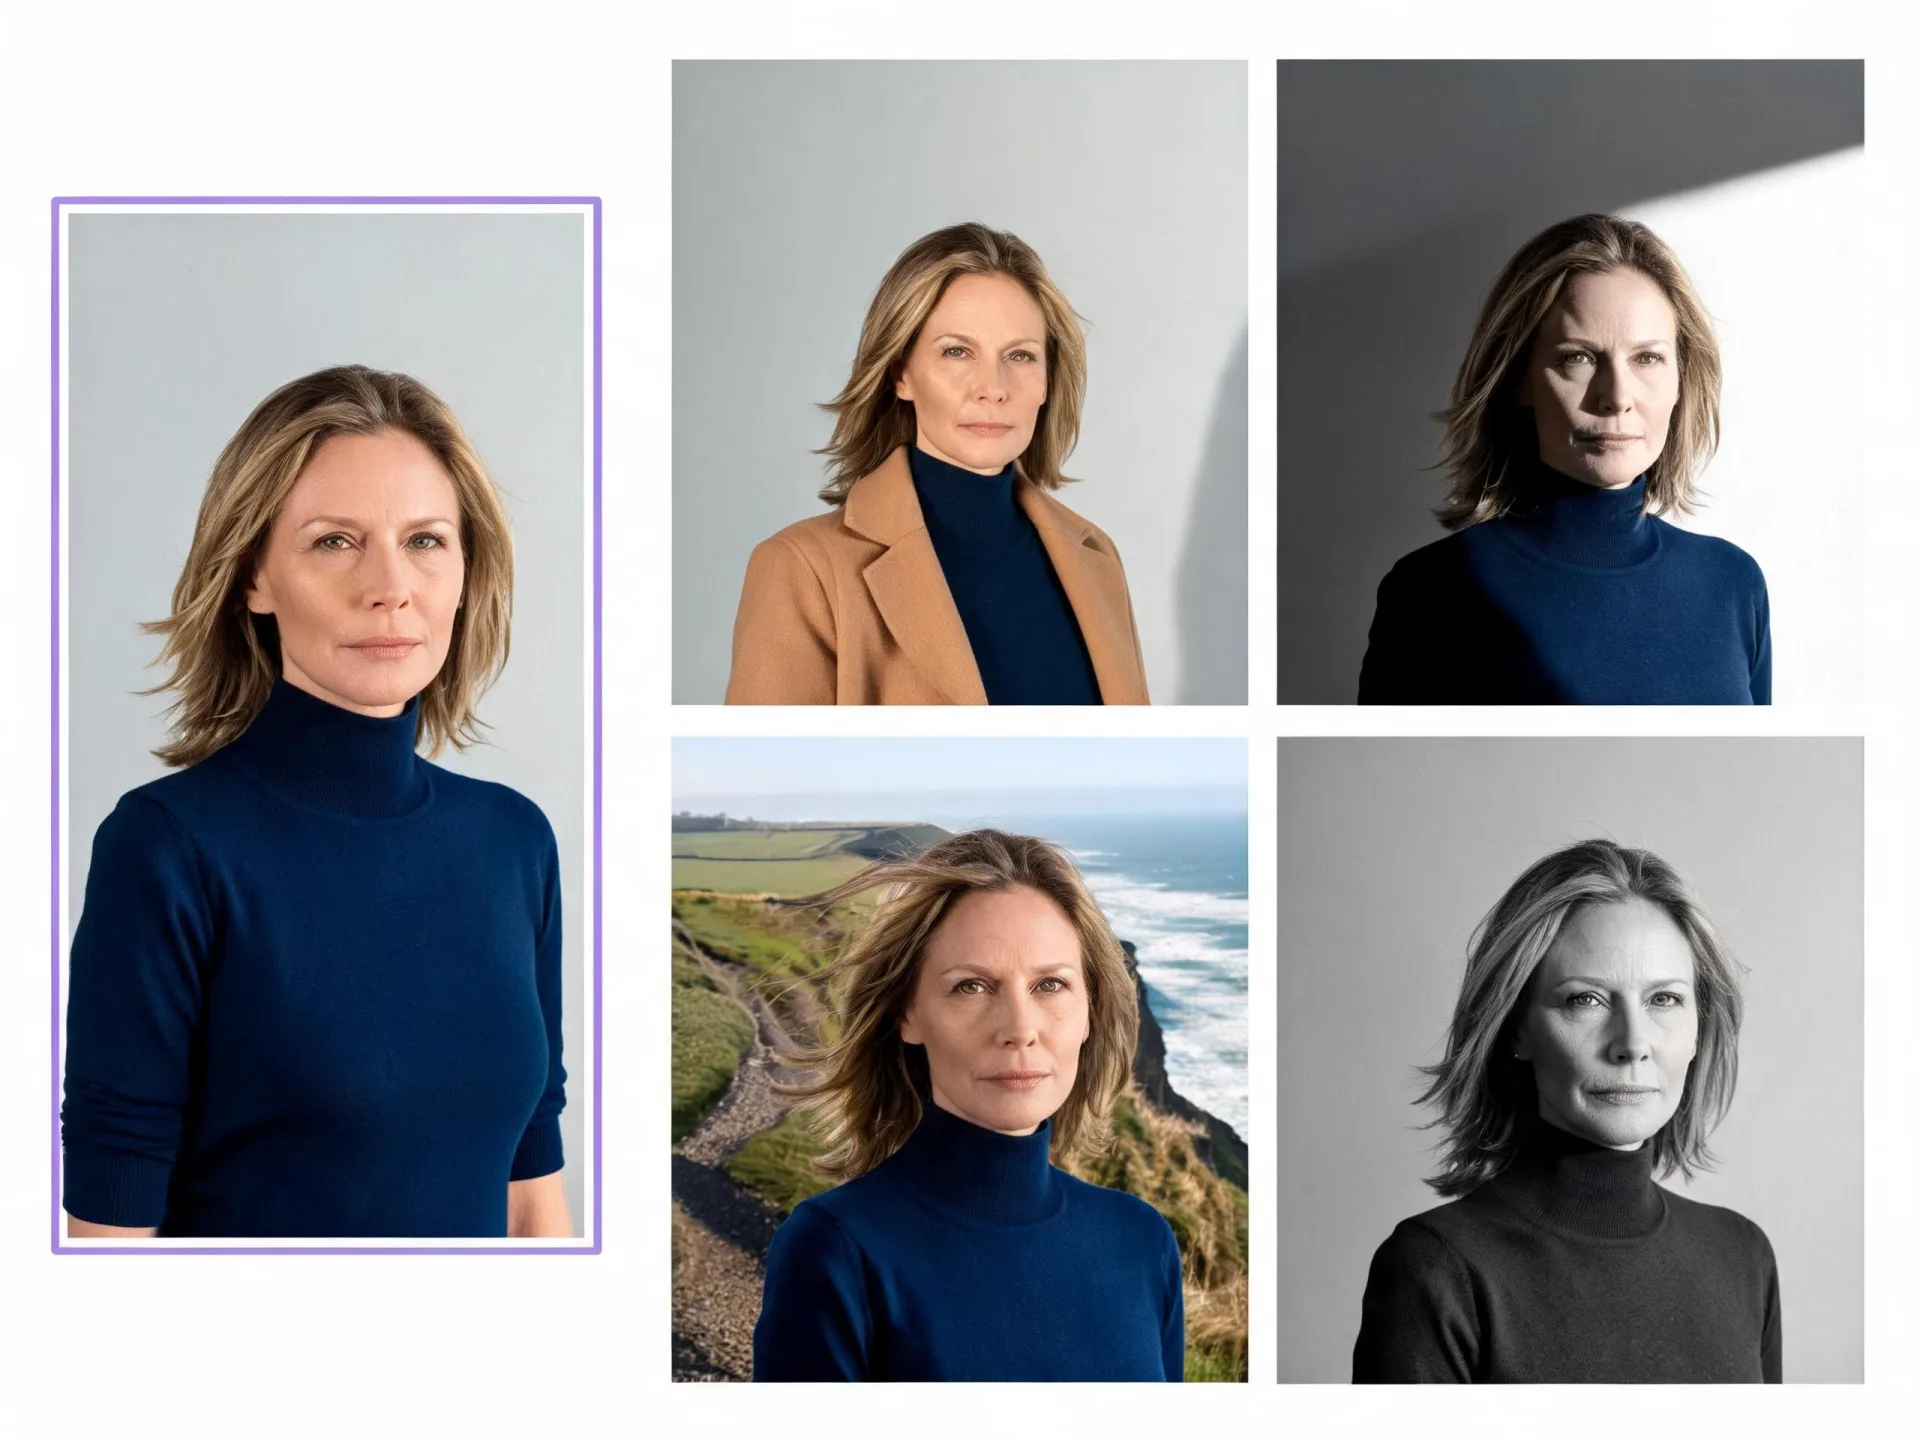
Direct clothing, style, lighting, or scene
Use the reference to direct identity, clothing, style, lighting, composition, and scene. It guides the generation rather than locking it, so review the output and regenerate when one detail has to land.
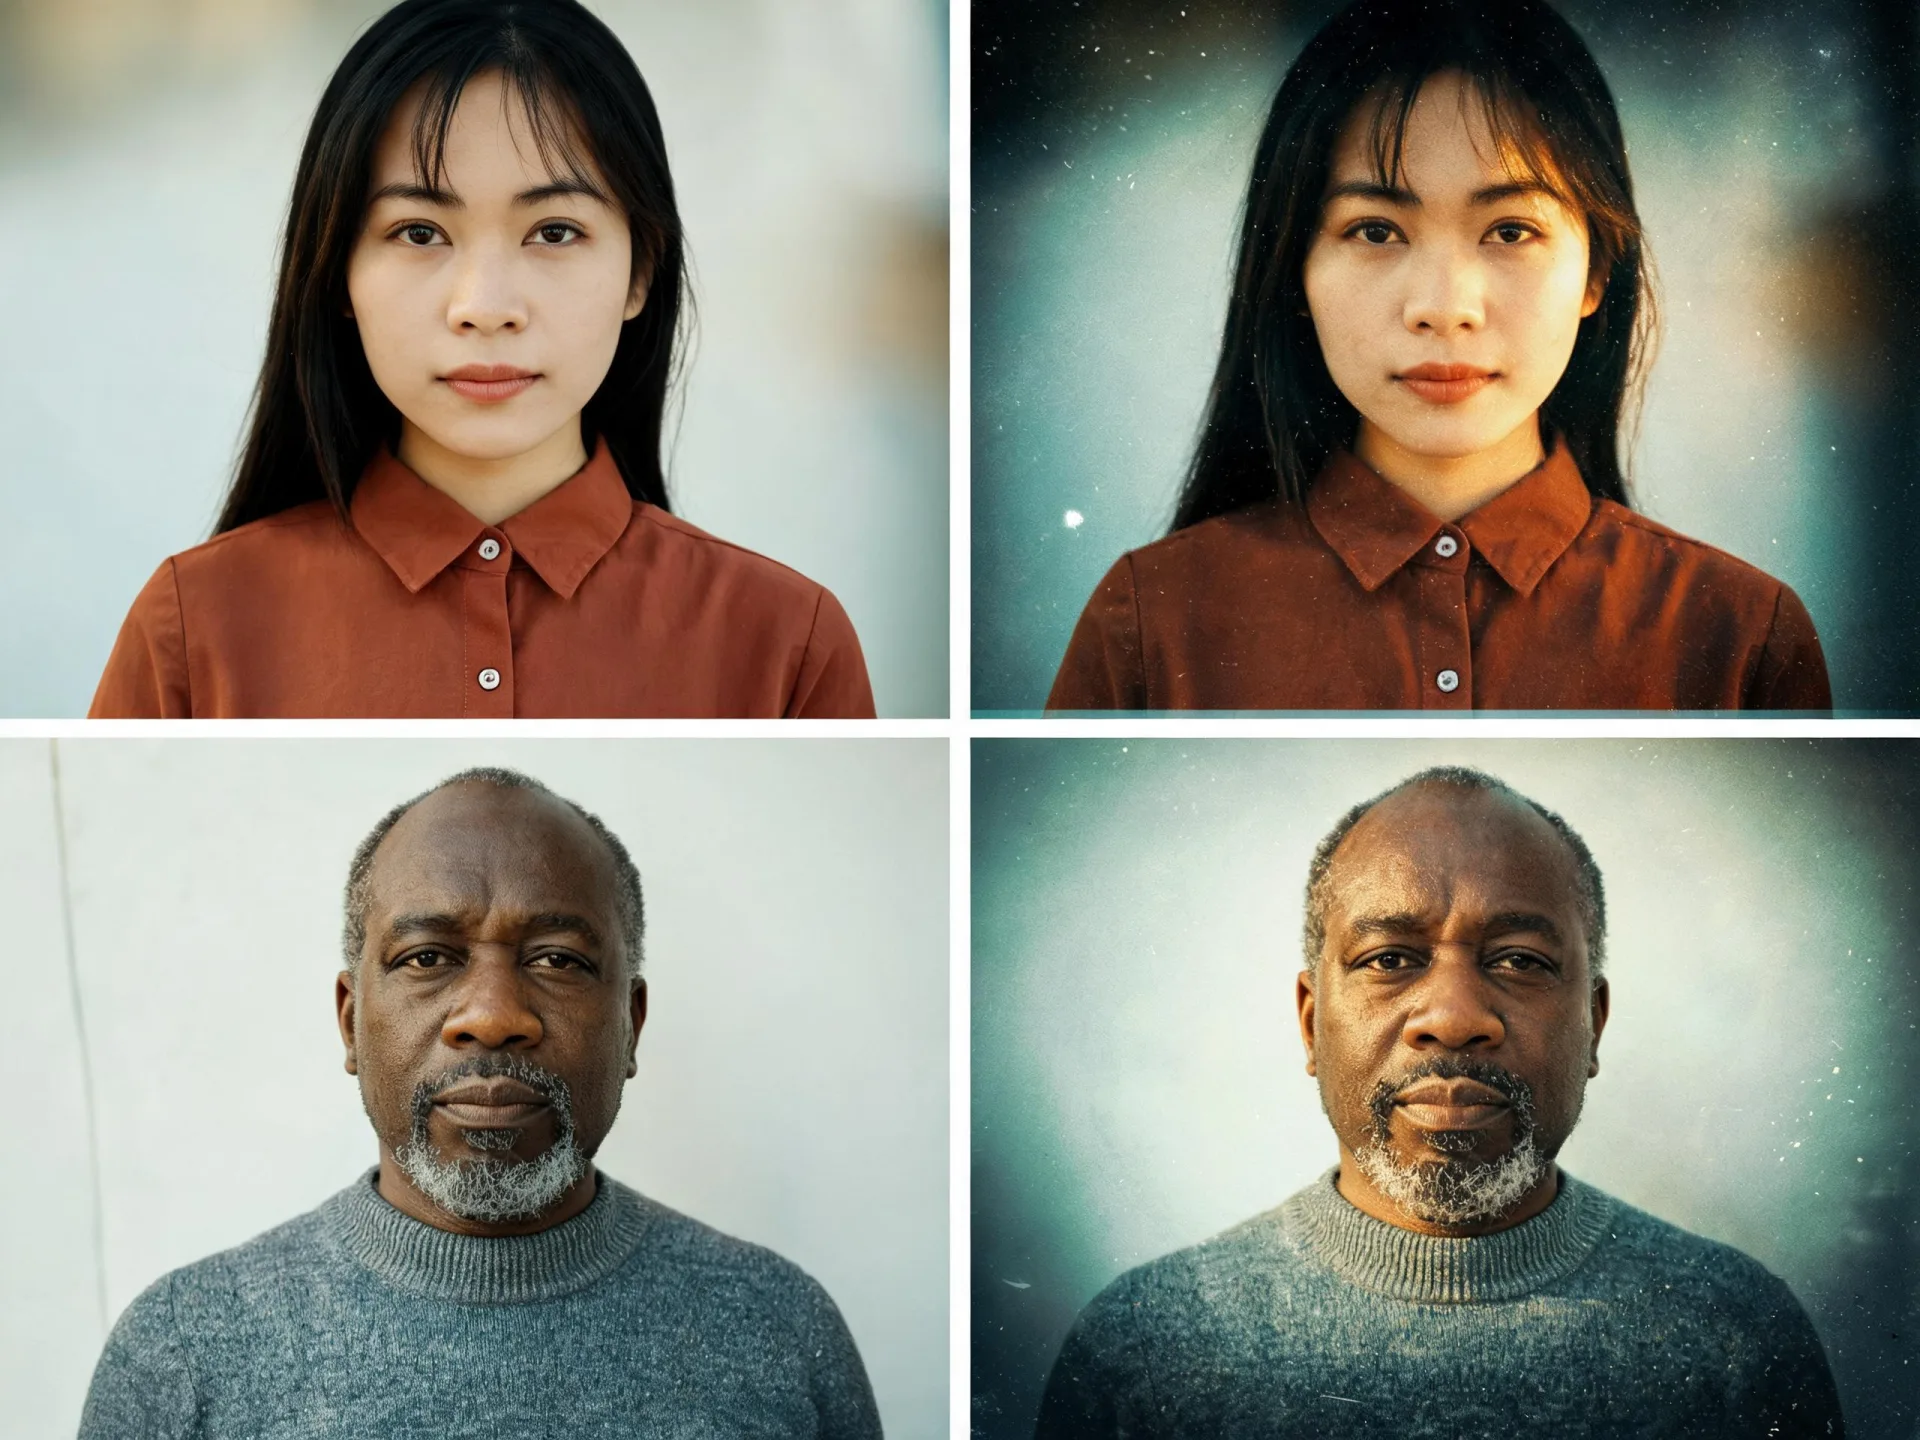
Apply a style template on compatible models
Supported LoRA style templates run on compatible models, so a look you use often can be reapplied to a new reference instead of rebuilt in the prompt each time. Availability depends on the model you select.
Use an Image You Already Have as the Reference
An image to image AI generator starts with a file you supply, so the subject and framing already in your shot carry into the result. An AI image generator where you can upload images has to answer two things first: what your reference controls, and how many files one run accepts.
01
Image to AI: What the Model Does With Your Upload
Your reference works as an instruction, not as a base the model paints over. The model reads it for identity, clothing, lighting, and composition, then regenerates the whole picture from those cues, which is why small details can shift between the source and the result. How close it lands depends on the model you choose, the prompt, and the quality of the file you started with.
02
One Image, Several References, or a Whole Batch
One file is enough. Several can be combined so a single result draws on all of them, and Batch Mode processes each uploaded reference separately when you want the same treatment across a set. Multiple reference images can go into a single run.
03
What Makes a Good Reference
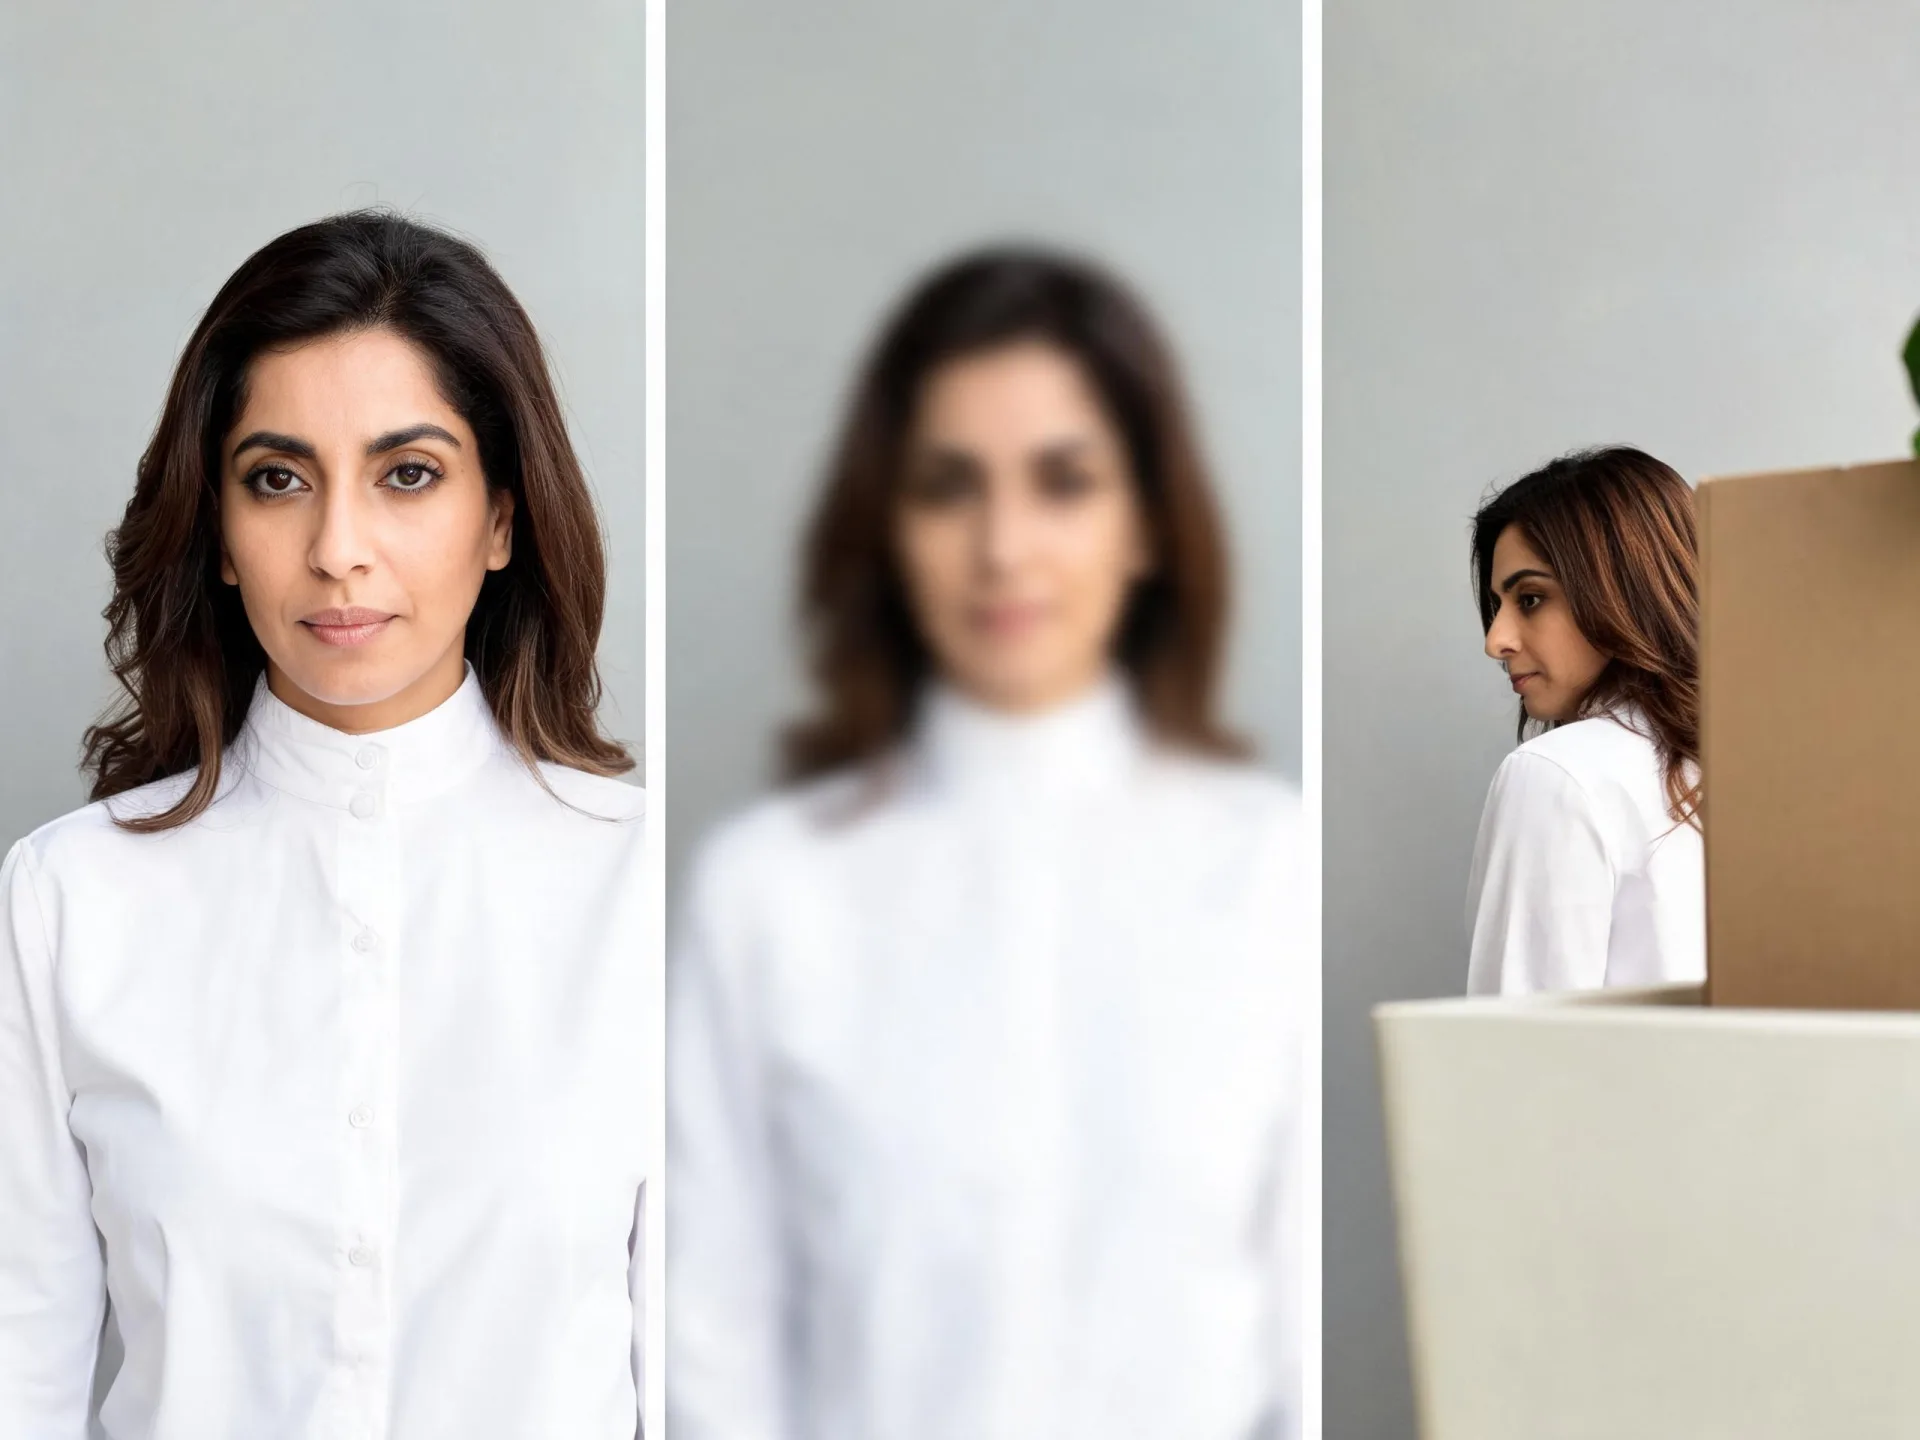
A clear subject, enough resolution to show the detail you care about, and that detail actually visible in the frame. Heavy blur or extreme compression limits what the model has to work from, and anything hidden behind an arm or a shadow cannot be reconstructed. Crop before you upload if the important part is small.
How to Create an AI Image From a Photo
Four steps to generate AI images from a photo you upload. The model you pick in step two decides which settings appear later.
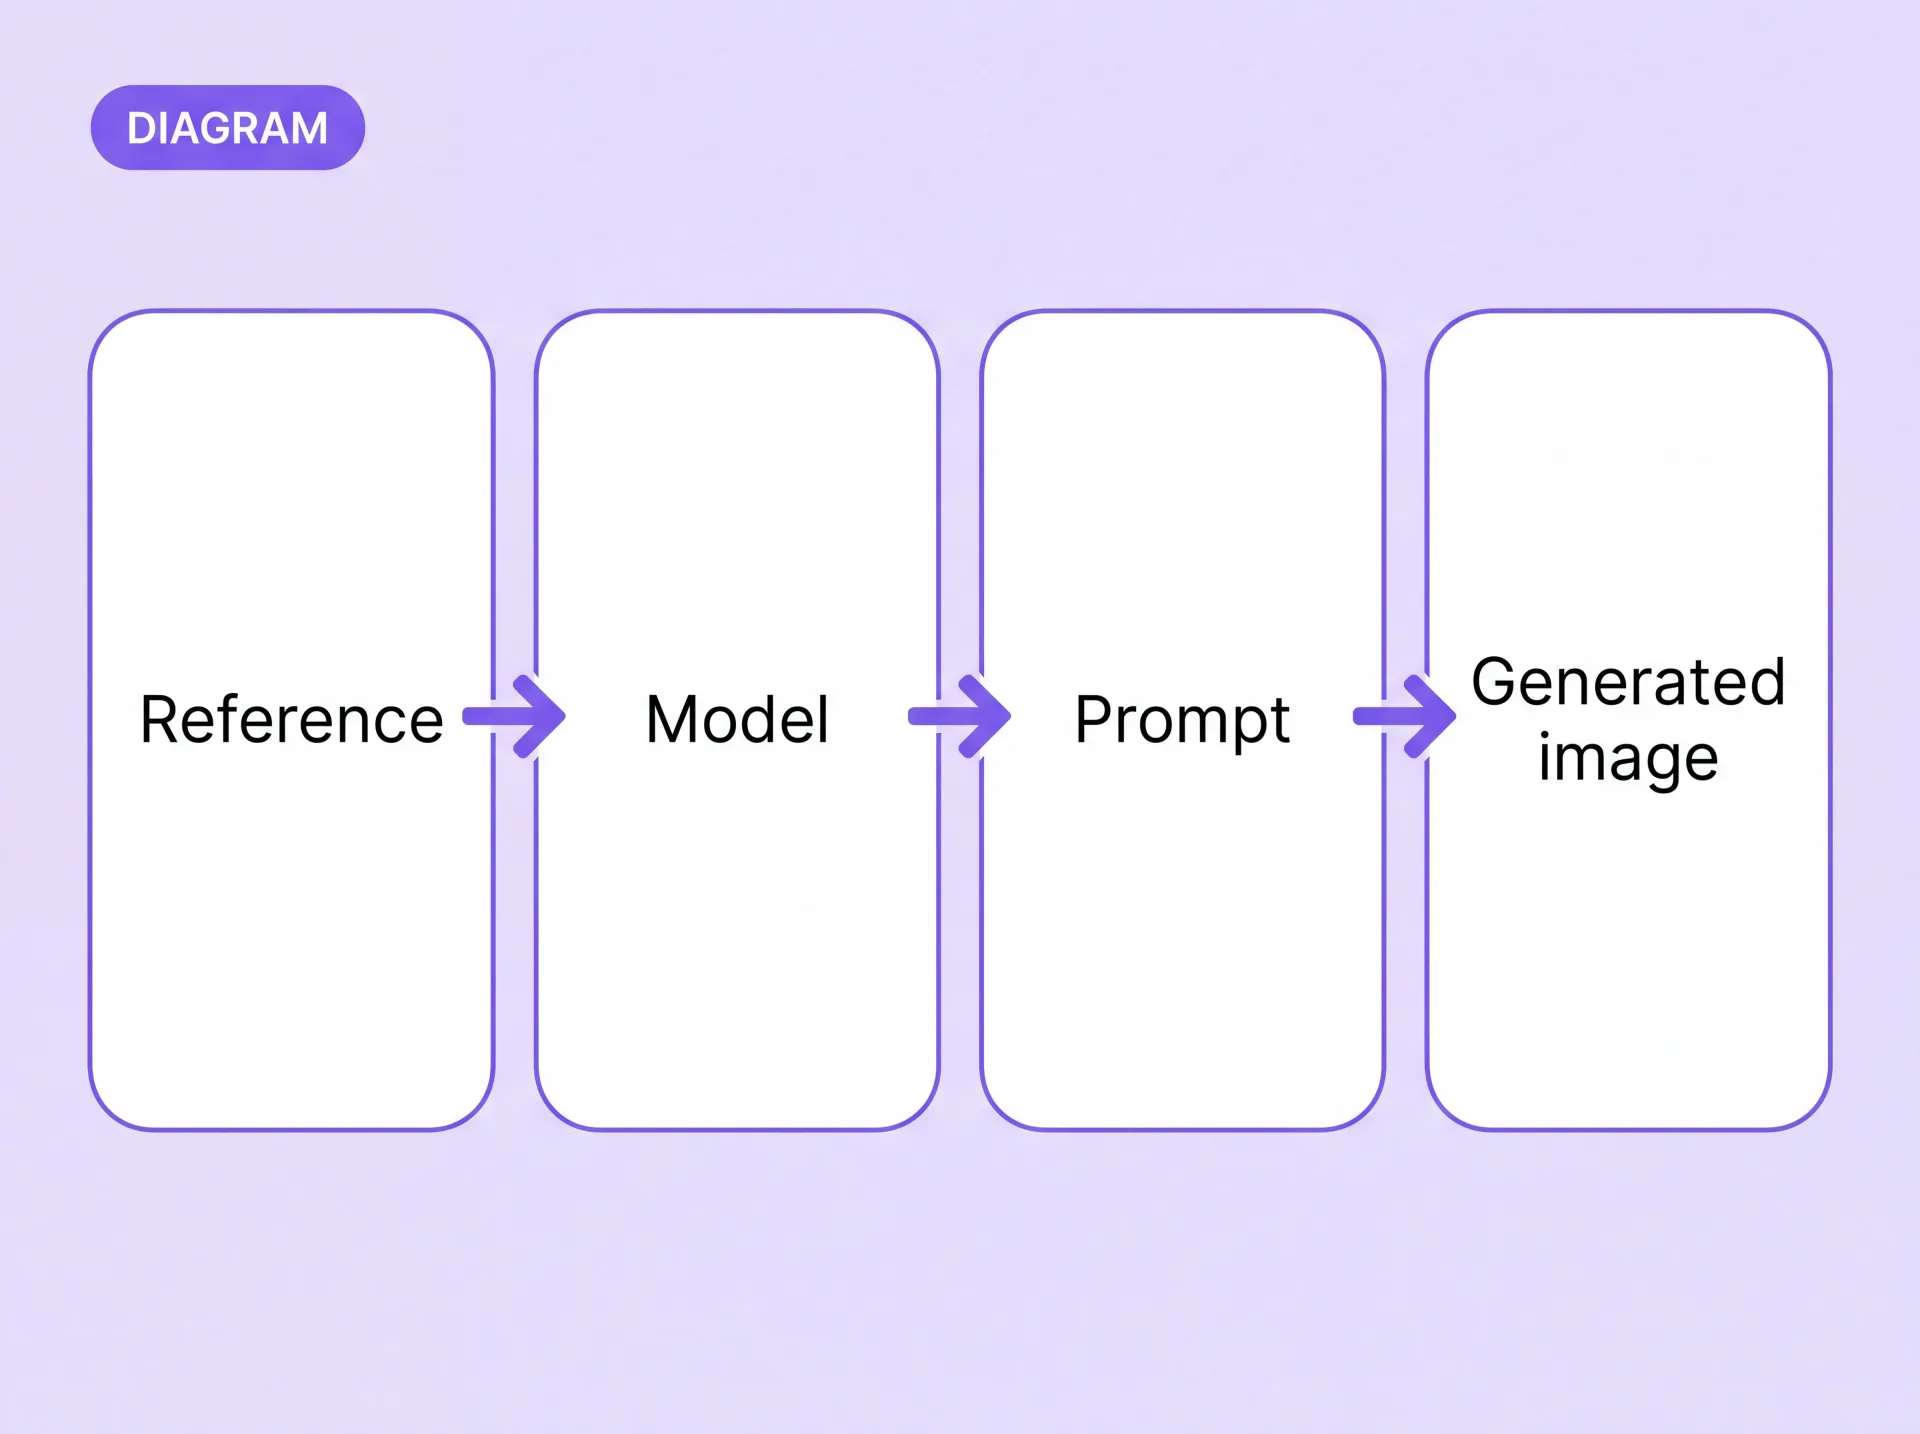
Image to Image Generator Settings You Can Control
Control is the difference between a novelty and a tool you can use twice. These are the settings that change what comes out, and the ones that depend on the model you picked.
Model
Sets which controls, output sizes, and behaviors are available for the run. Read every setting below through this choice first.
Aspect ratio
Choose the frame before generating — square, portrait, landscape — so the output arrives in the shape the asset needs.
Width and height
Resize settings control the output dimensions directly when a preset ratio is not what you need for a specific placement.
Number of images
Return multiple images in a single run, so you have options to compare instead of one result to accept or redo.
Batch Mode
Processes each uploaded reference separately instead of combining them, so one configuration covers every reference in the run.
Sequential Generation
On a supported model, aims for a more consistent series across several outputs rather than treating each one as unrelated.
Style templates
Supported LoRA style templates apply a preset look on compatible models. Availability depends on the model you selected.
Maximum resolution
Model-dependent. Supported models generate higher-resolution output, and ranges differ by model, so check what yours allows before you commit to a size.
Image to Image vs Text to Image: Which Should You Use?
If the source already exists, a photo-to-AI workflow gets you there with less guesswork. If it does not exist yet, generate it in Text to Image first, then use that file as the reference.
Which ZenCreator Workflow Fits Your Image
An AI image generator based on the image you upload is one route among several. Match the job to the workflow so you are not fighting the wrong tool.
Edit, transform, or combine what is in an image
A new image generated from the references you upload and the prompt you write.
Image EditorSeveral versions of the same reference
A separate set of variations for each reference you upload, with your own count per file.
VariationsPut the result in motion
A short video clip generated from a still image, with model-dependent duration and quality controls.
Image to VideoLarger, cleaner output
Higher resolution and more visible detail from a file you already have. Results depend on the source quality.
UpscalerWho Uses Image-to-Image Generation
Four jobs that start with a file the team already owns. Each one runs the same upload-and-generate loop, with different settings.
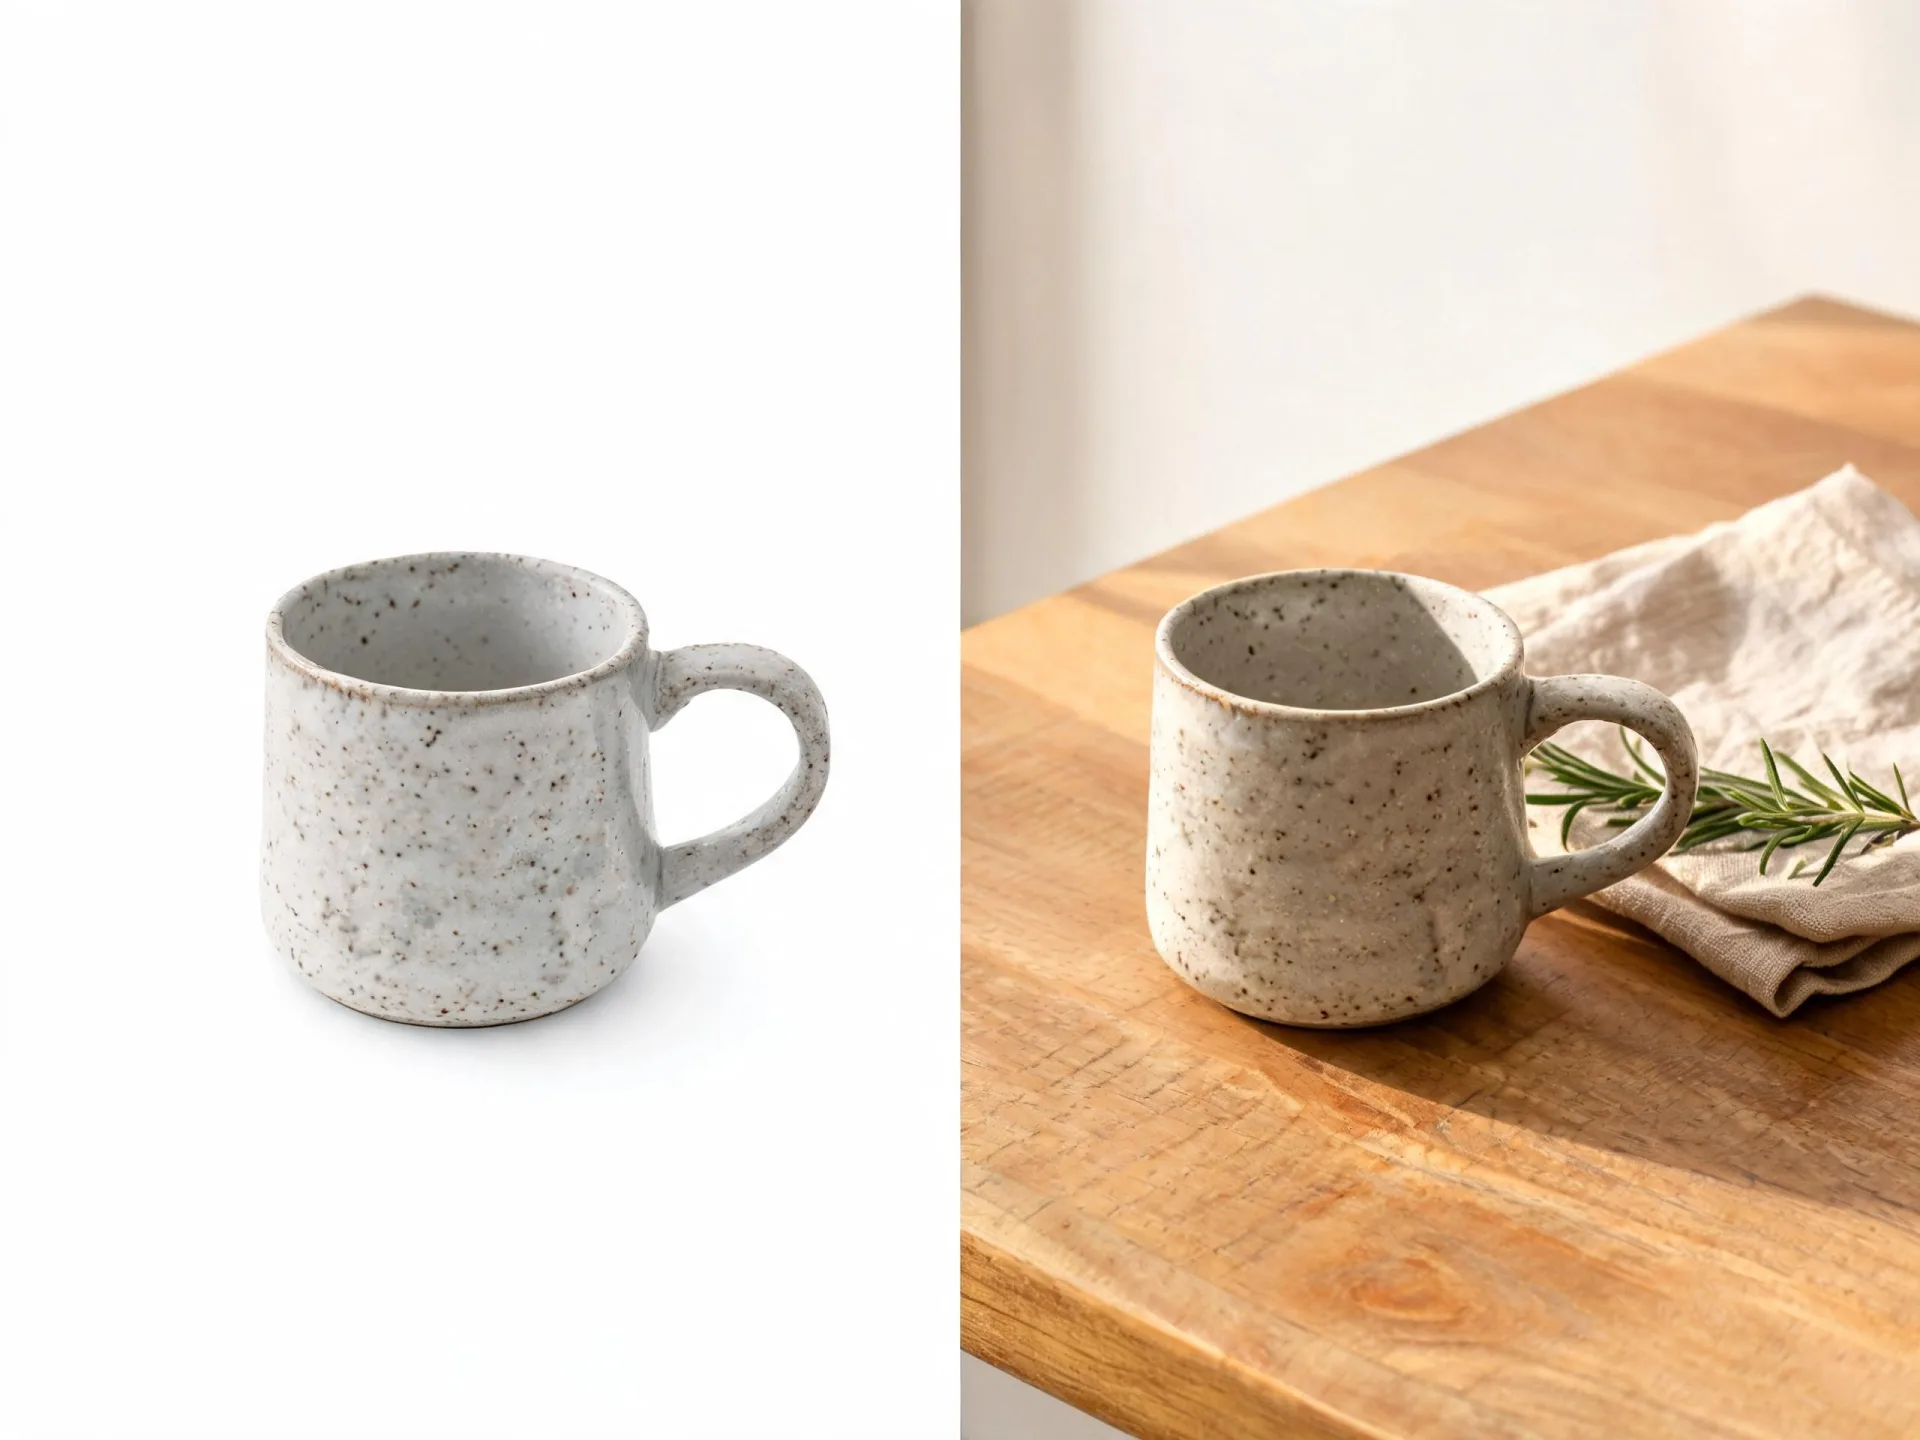
Product and lifestyle visuals from an existing shot
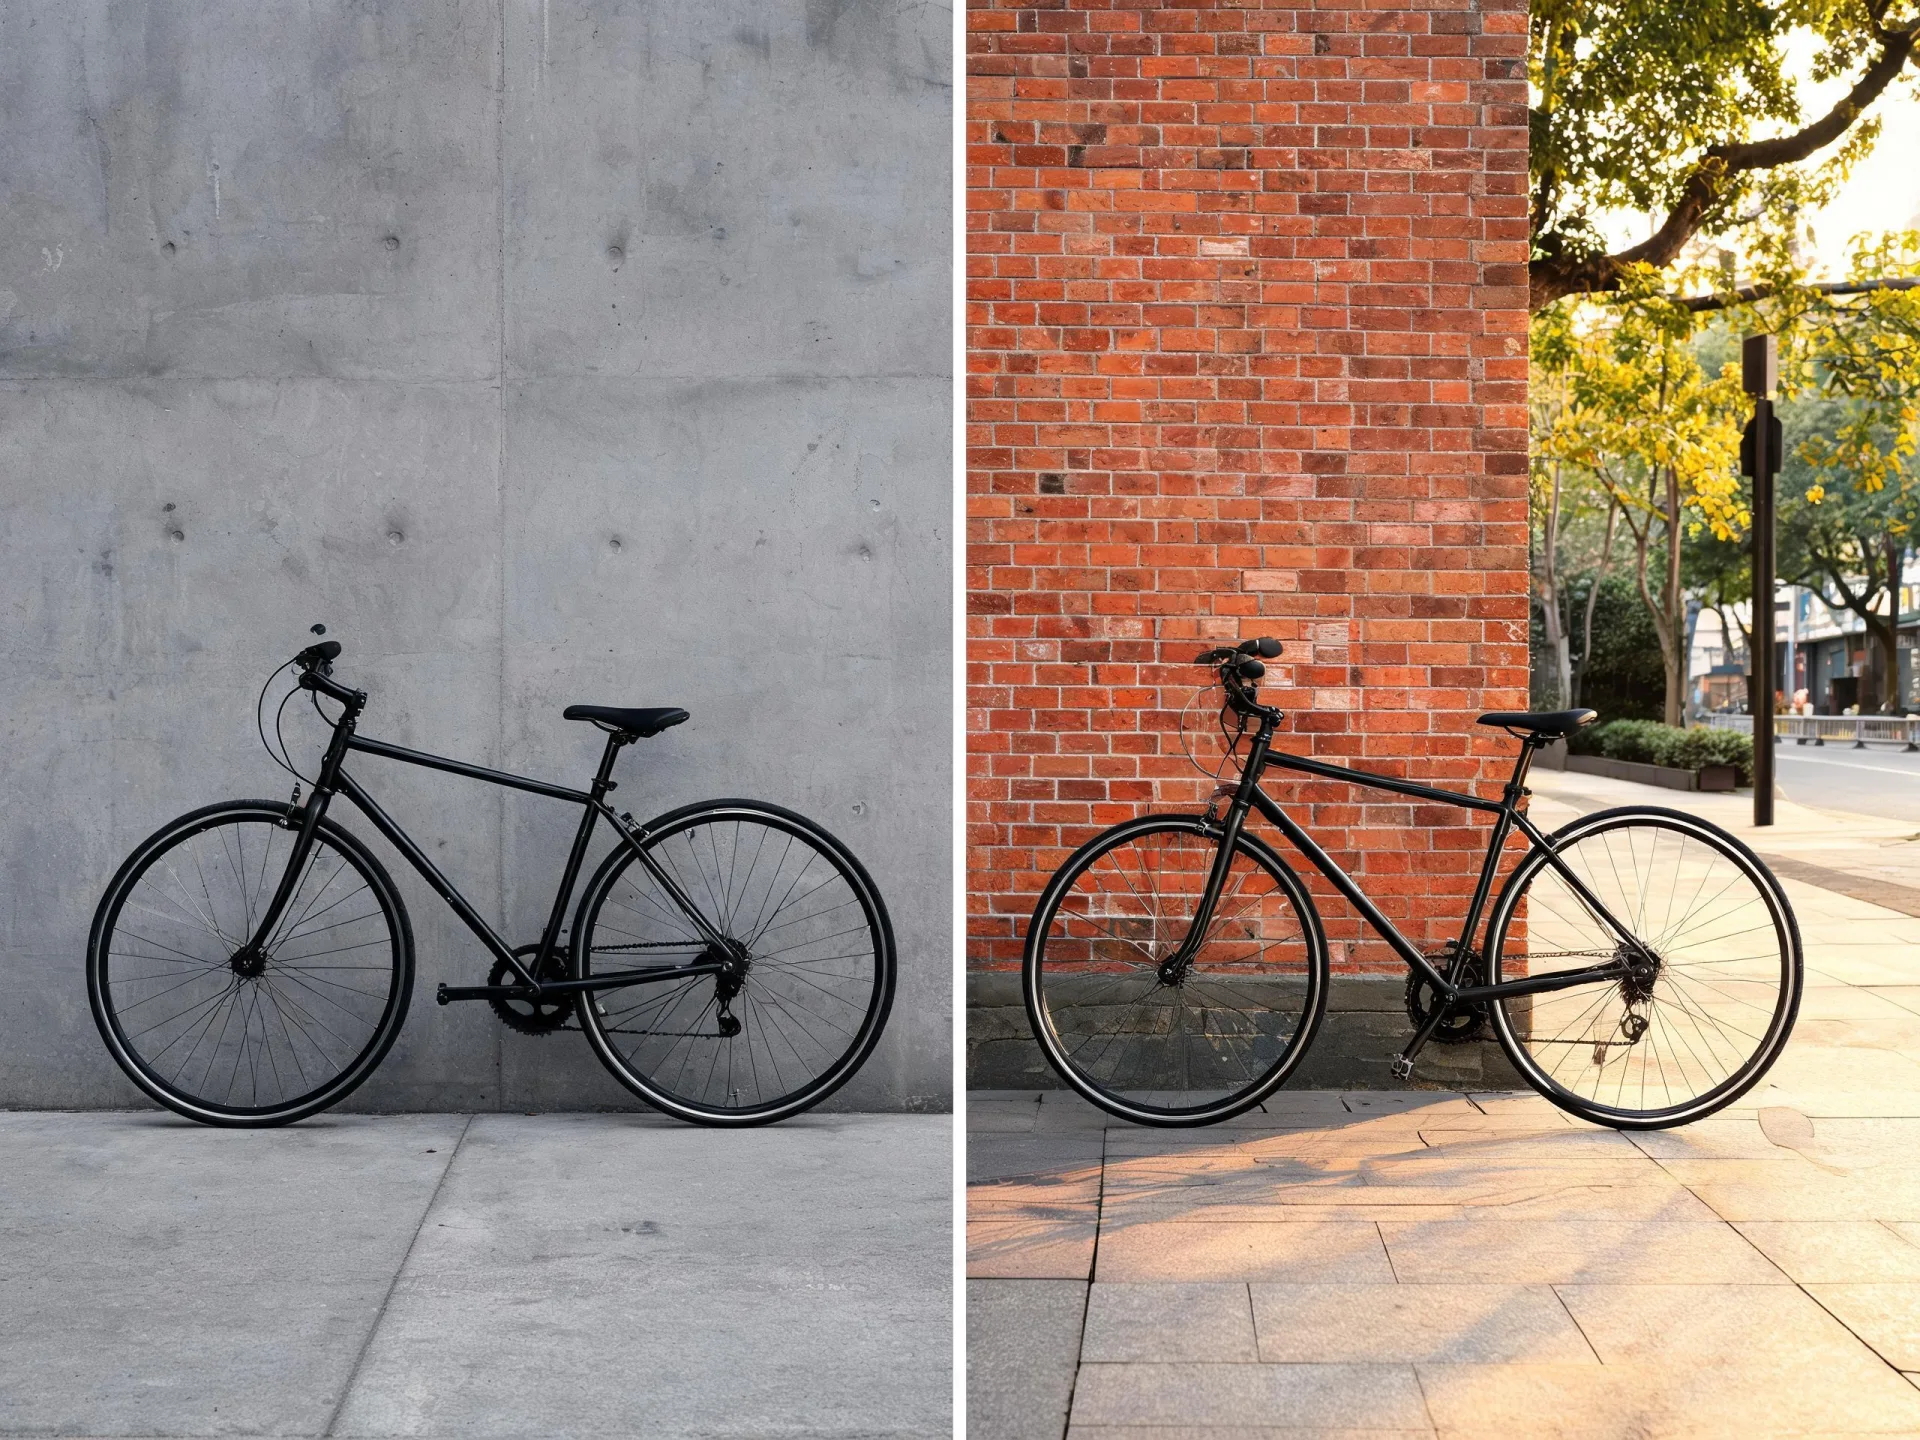
Used as an AI picture generator from a photo you already own, the editor puts the same product into a different scene, season, or background without a reshoot. Upload the product shot, name the setting you want, and compare the returns from a single run.
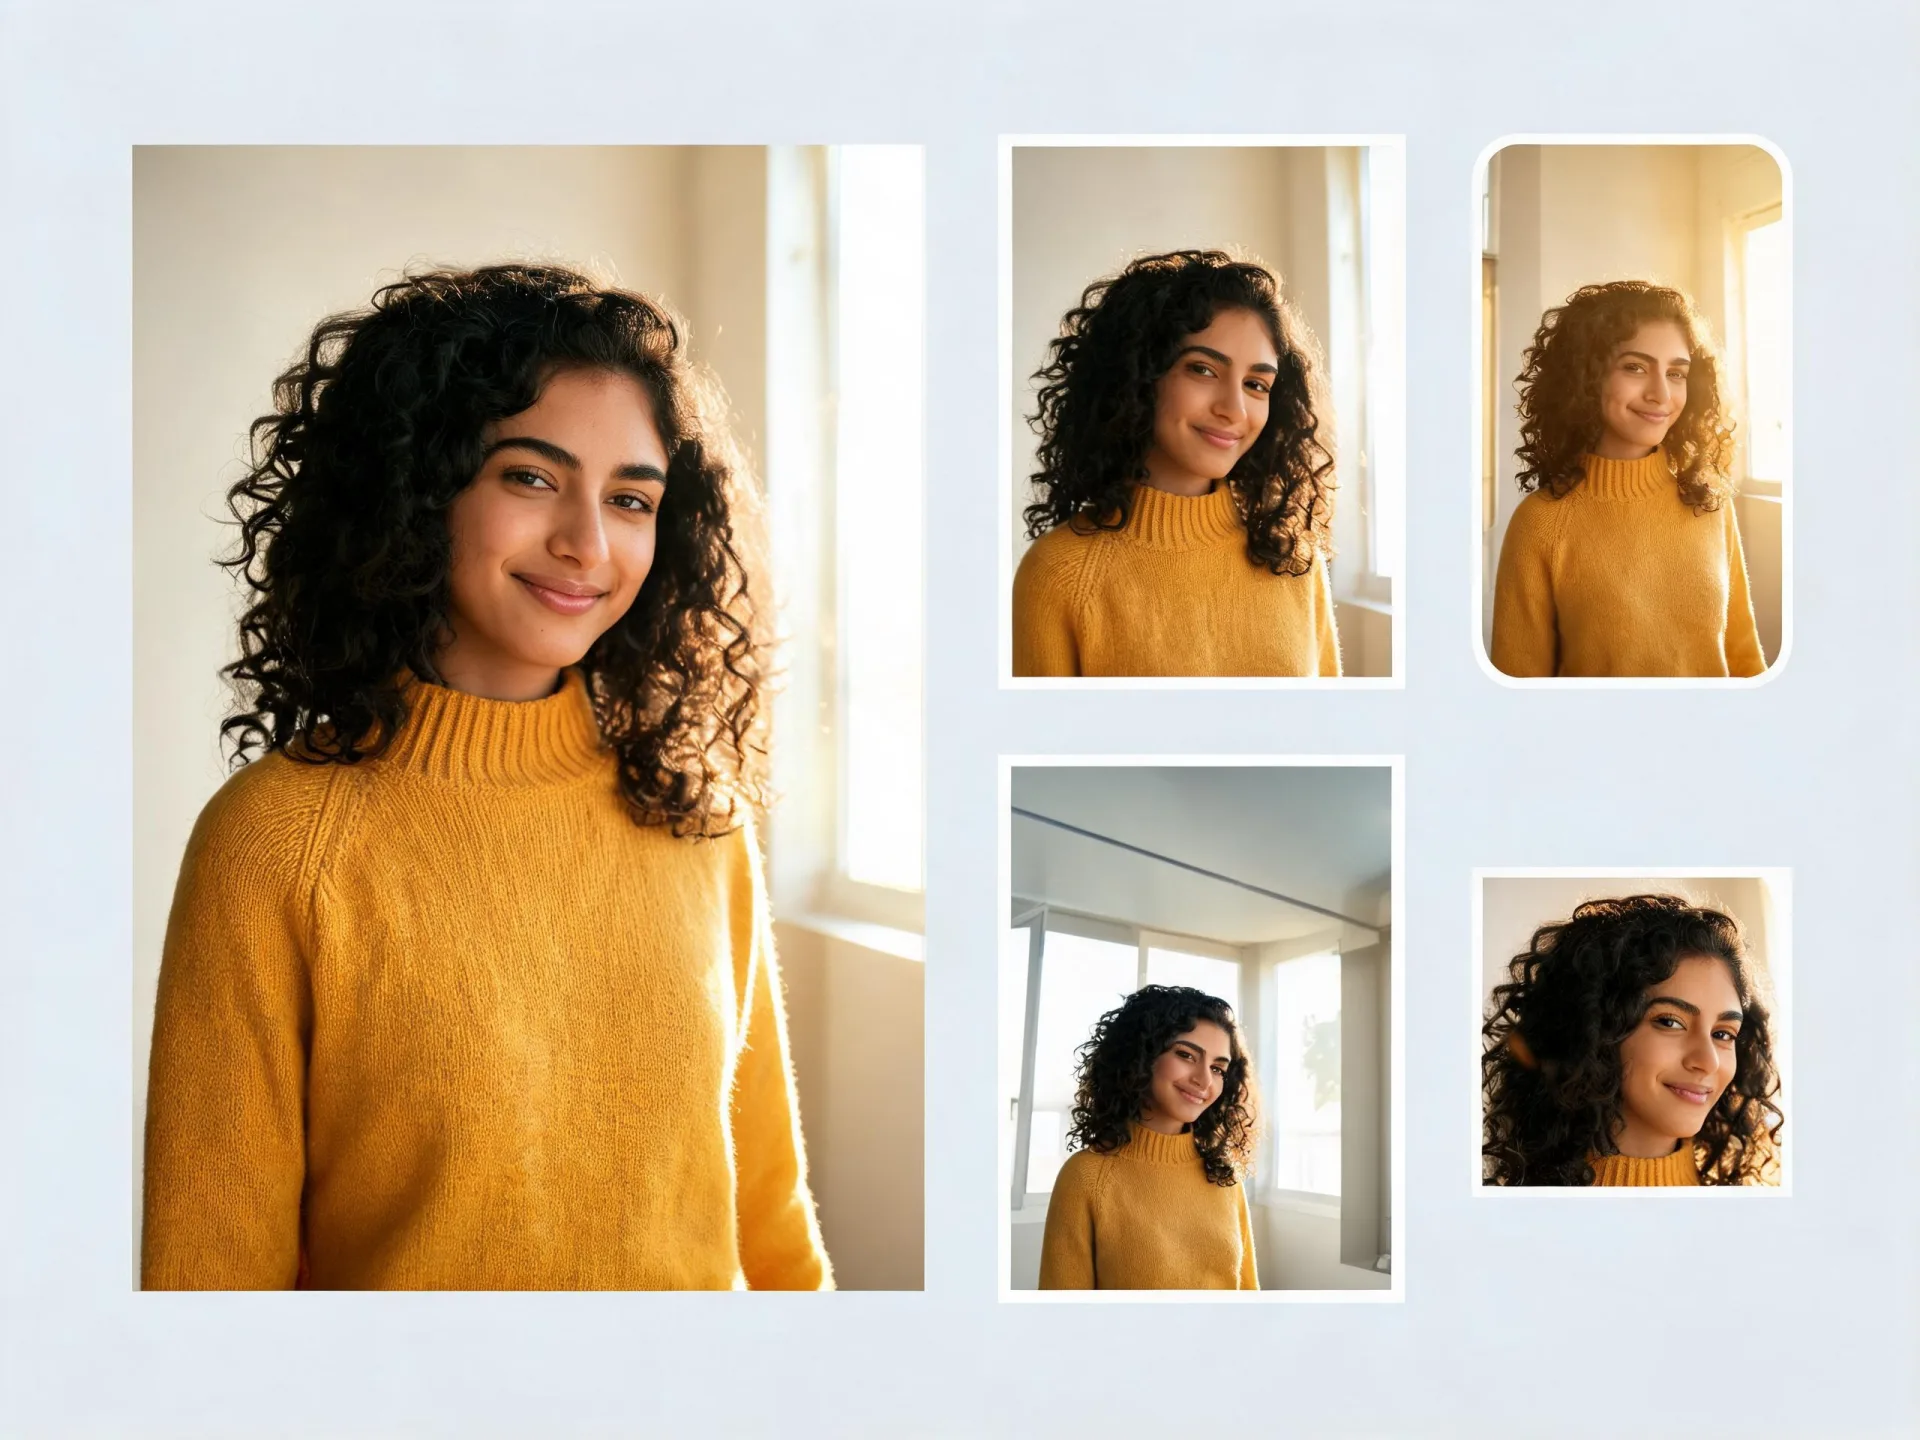
Social and UGC variants from one hero asset
One approved image becomes the source for a whole set of platform variants, with different crops, backgrounds, and treatments, instead of a separate brief for each placement. A single run can return several options, so you can compare treatments before committing to one.
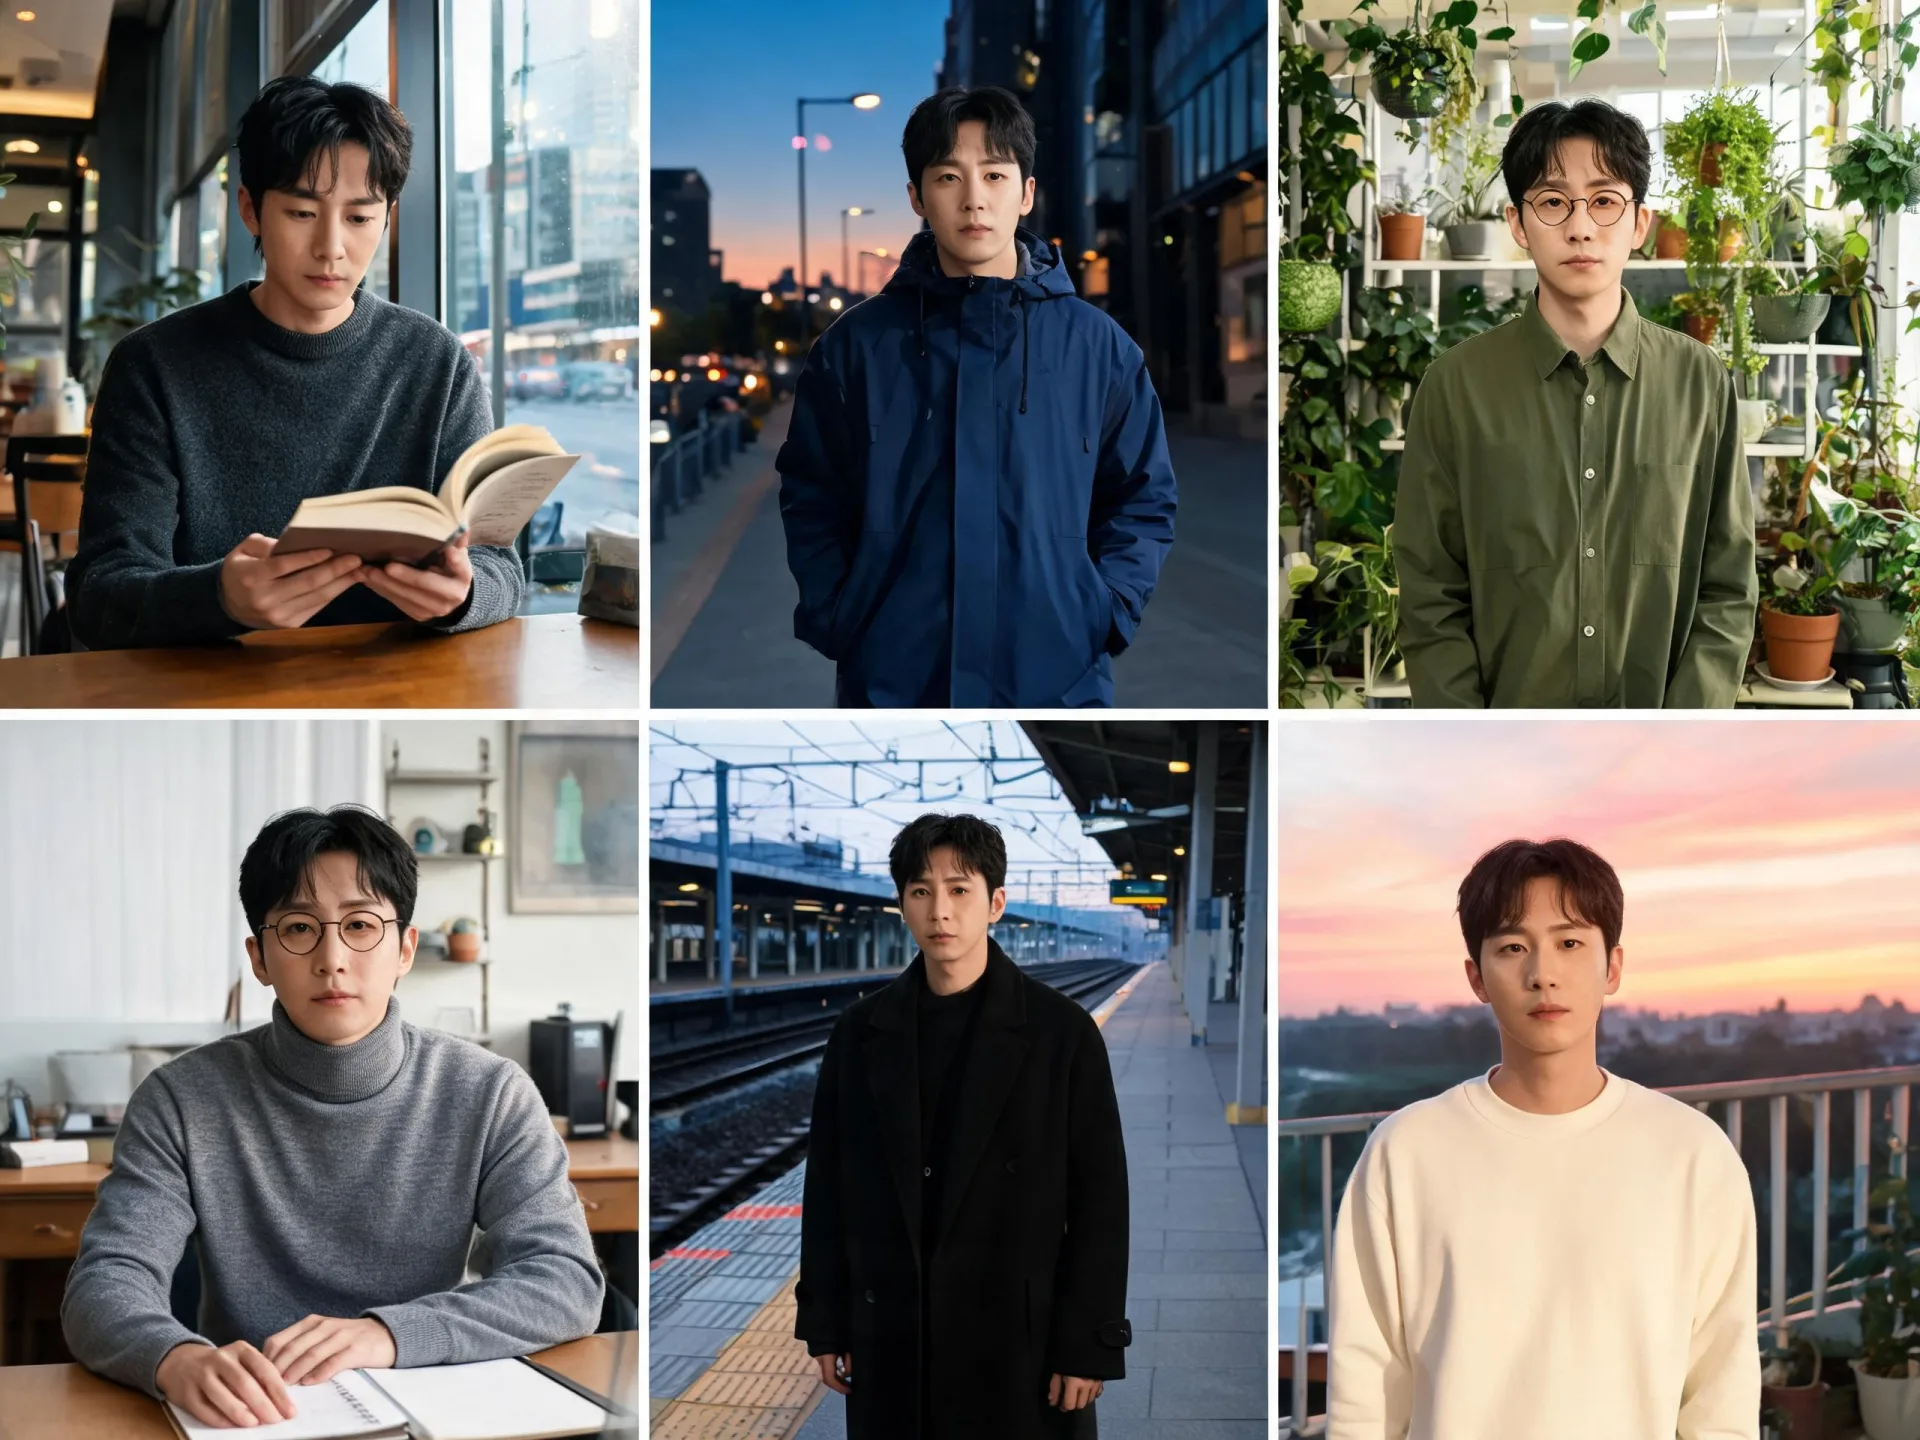
A recurring character or persona across a series
When the same face or character has to appear in several images, consistent references and Sequential Generation on a supported model both help the series hold together. Expect to review and regenerate: consistency is something the workflow aims for, not something it guarantees.
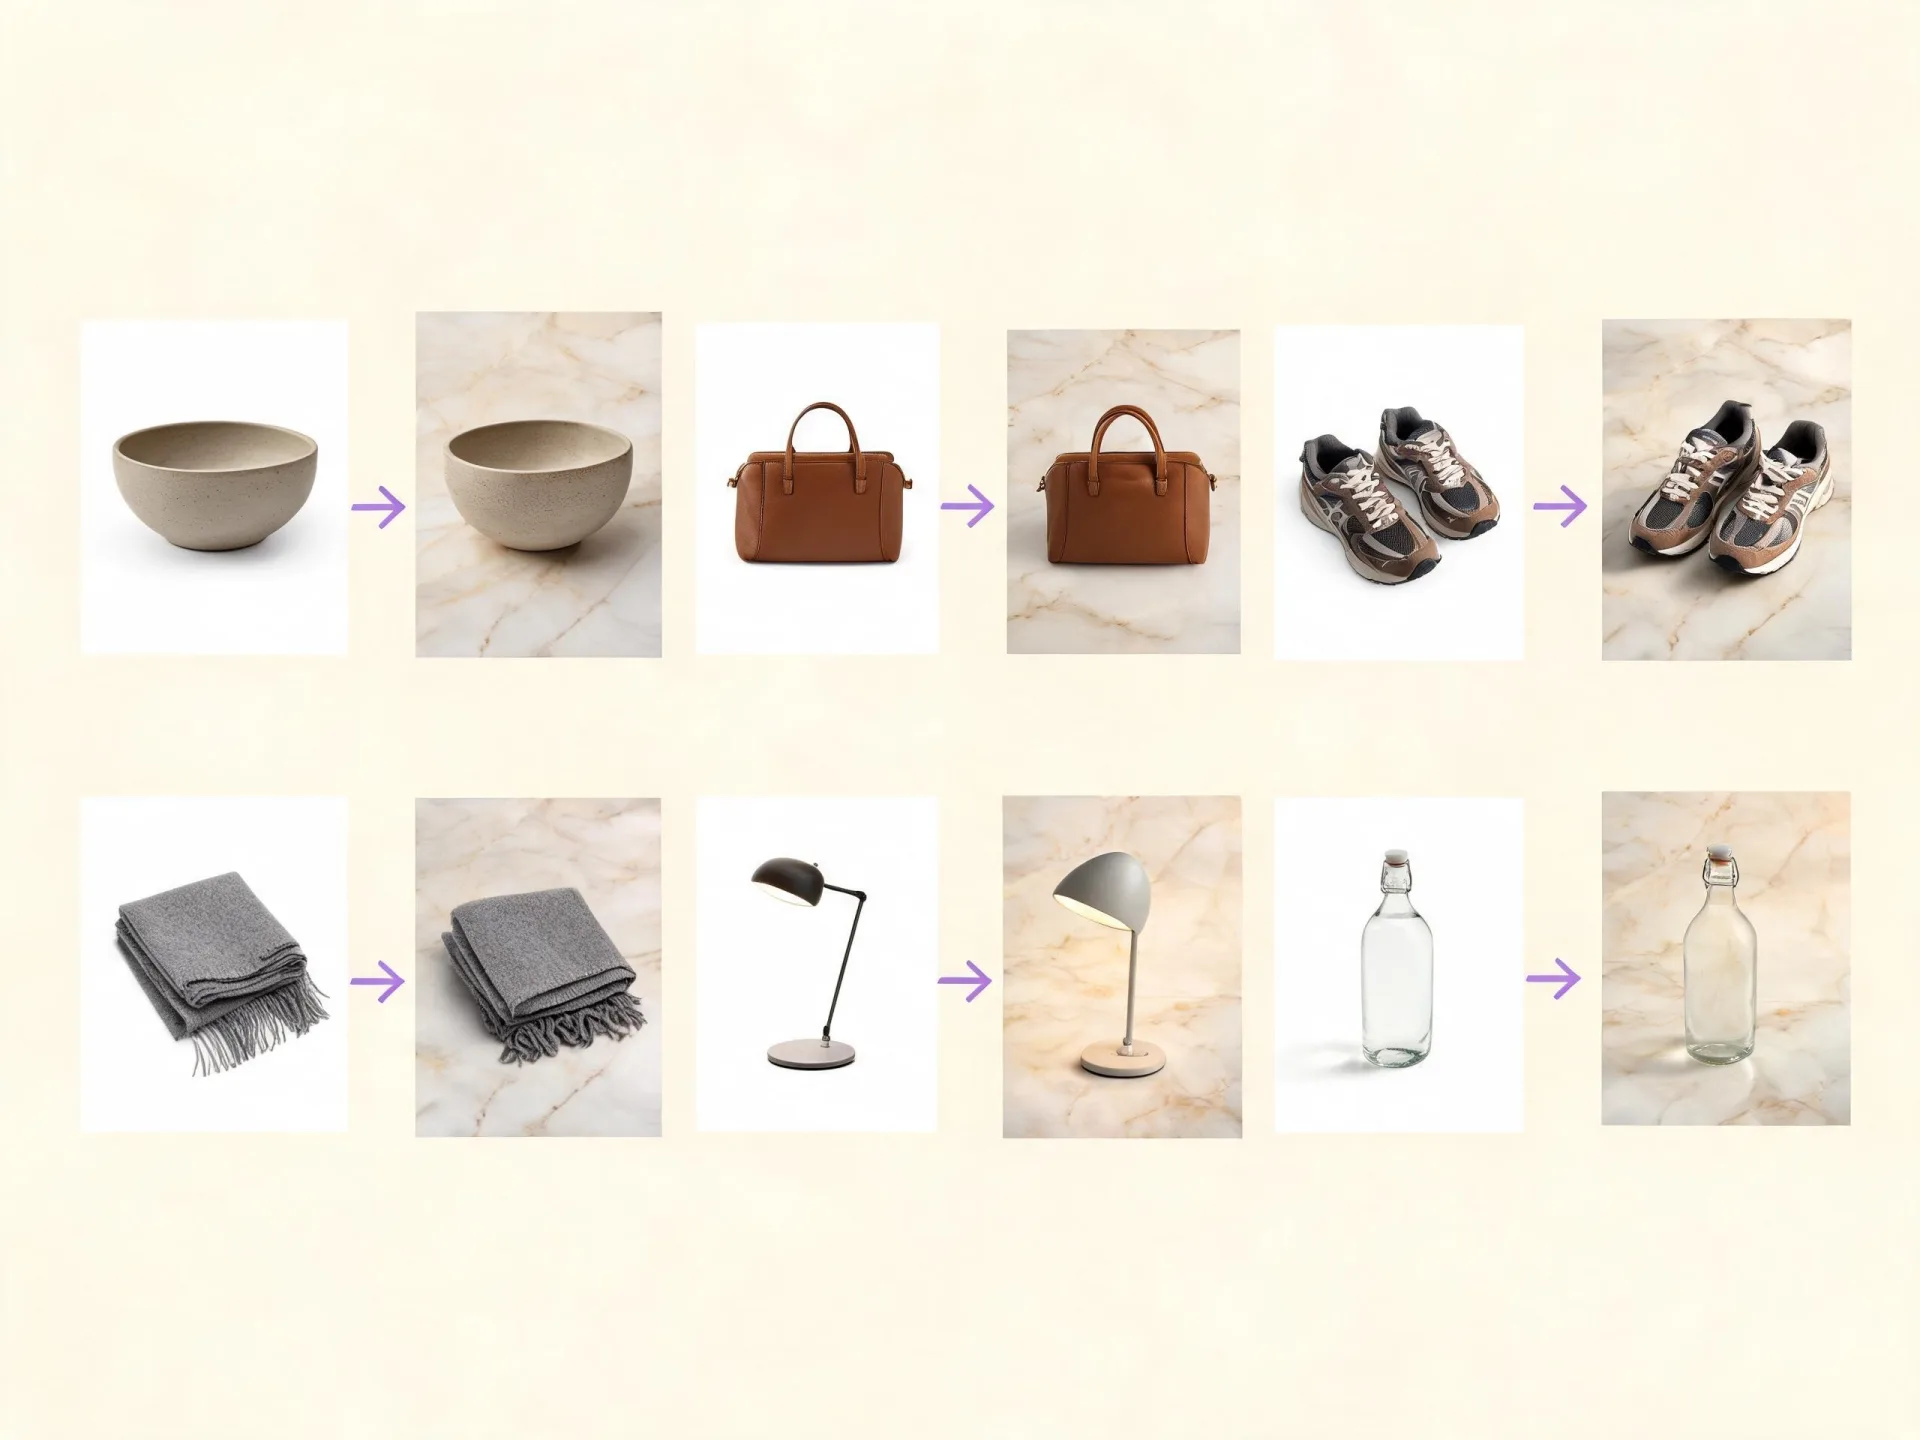
Small studio and agency batch work
Batch Mode covers the case where a whole set of client references needs the same treatment: one configuration, one run, separate results per file. Useful for catalog passes and repeatable style work where the instruction does not change between images.
AI Generated Images From Photos: Real Input and Output
Two jobs, shown as the file that went in and the image that came out. Each pair is an AI generated image from a photo, produced in the current Image Editor.
Rights
Only upload images you have the right and permission to use. If an image includes another person, make sure you have the consent required for your intended edit and use. See the Content Policy and Terms and Conditions.
You already have the image the run needs
Upload it, name the change, and generate.
Questions About Generating From an Image
What can an AI image generator from image do with my photo?
It uses your photo as the reference for a model you select, then generates a new image from it: a changed scene, a different outfit, an added or removed element, or your photo combined with other references. What it will not do is retouch the file you uploaded — no brush, no mask, no layer stack, and no pixel-level edit of the original.
Do I need to write a prompt, or is the image enough?
The image is enough to generate. The prompt is what turns a general result into the specific one you asked for: it names the change, the style, or the element that should differ from the reference. An AI image generator with image input and no prompt still returns something; it just leaves more of the decision to the model.
Will the result keep the same face, outfit, and background?
Not as a guarantee. References guide identity, clothing, and composition, but the model regenerates the image rather than copying pixels across, so details can shift between the source and the result. A supported model with Sequential Generation aims for a more consistent series, and a clear, well-lit reference gives it more to work with. Plan on reviewing the output.
What do I need to start, and how are credits used?
Inside the editor, what a run needs is the reference image and, optionally, a prompt describing the change. Credit cost may be displayed before you generate, so you can check what a run will consume before committing to it rather than finding out afterwards. See the Pricing page for current details.
Can I use the generated images commercially?
Commercial use is permitted under the ZenCreator Terms and Conditions, subject to your compliance, applicable rights, and the terms governing the service and the source materials. One limit worth knowing: similar or identical outputs may be generated for other users, so you do not receive exclusive rights to a generated concept or style.
Do I need permission to upload a photo of someone else?
Yes. You must own or have the rights, licenses, permissions, and consents required for what you upload and for the way you intend to use the result — and when the image involves a real person's likeness, that includes the consents applicable law requires for your intended use. Prompts and uploaded images are automatically screened before generation. The Content Policy sets out what is and is not allowed.
Does this run in the browser?
It runs in the browser, and the generation itself happens in ZenCreator's cloud rather than on your own machine, so the run does not depend on local hardware. Upload the reference, choose the settings, generate, and download the result from the same tab, whether that is one file or a whole batch.
Start From the Image You Already Have
Upload a reference, pick your settings, generate, and download the result. The image you need is already on your drive.